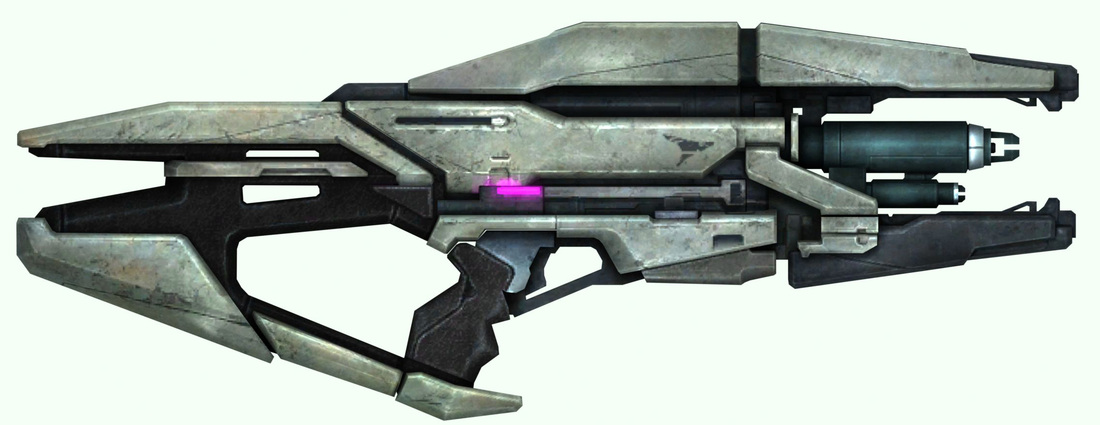
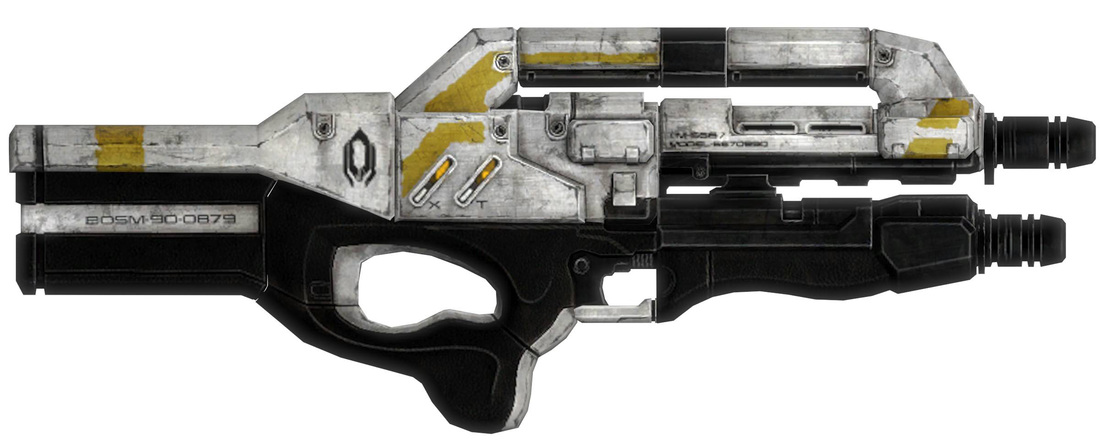
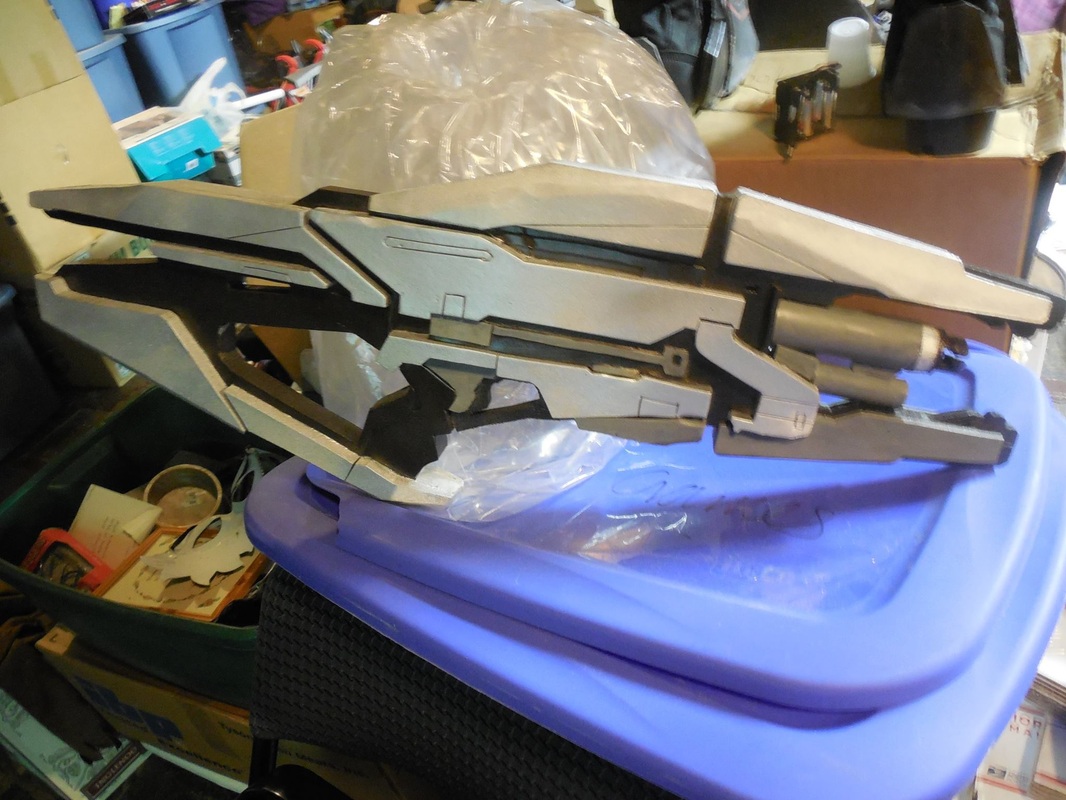
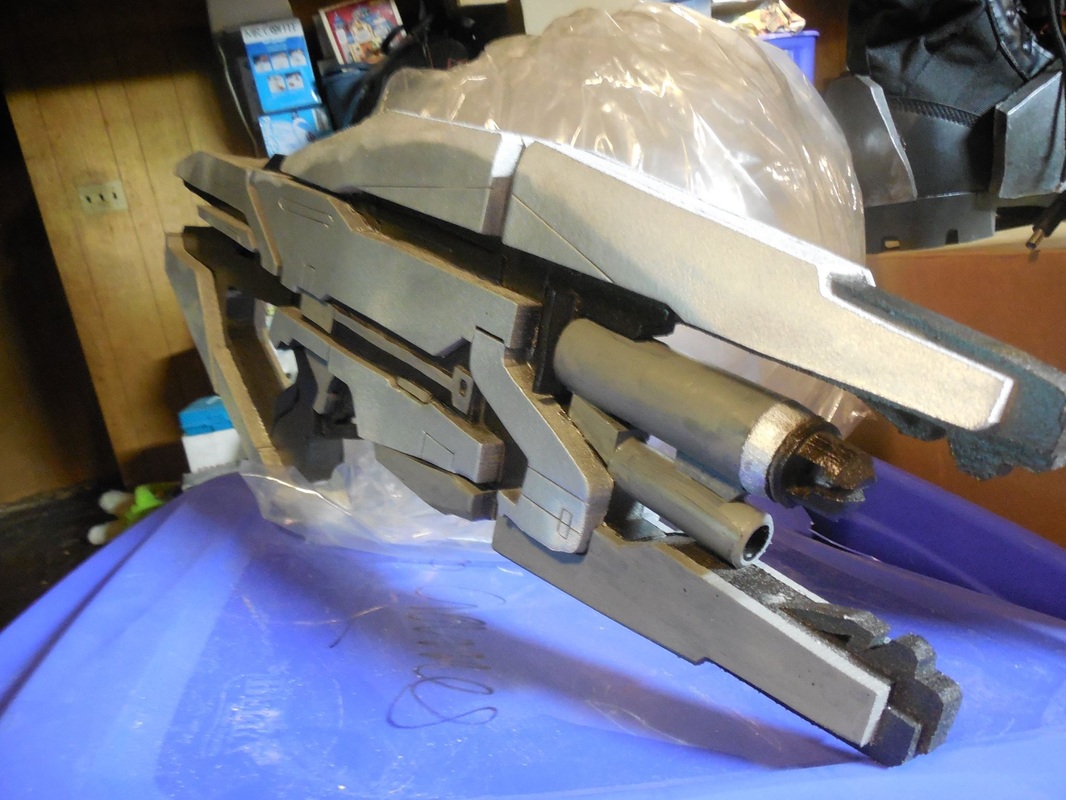
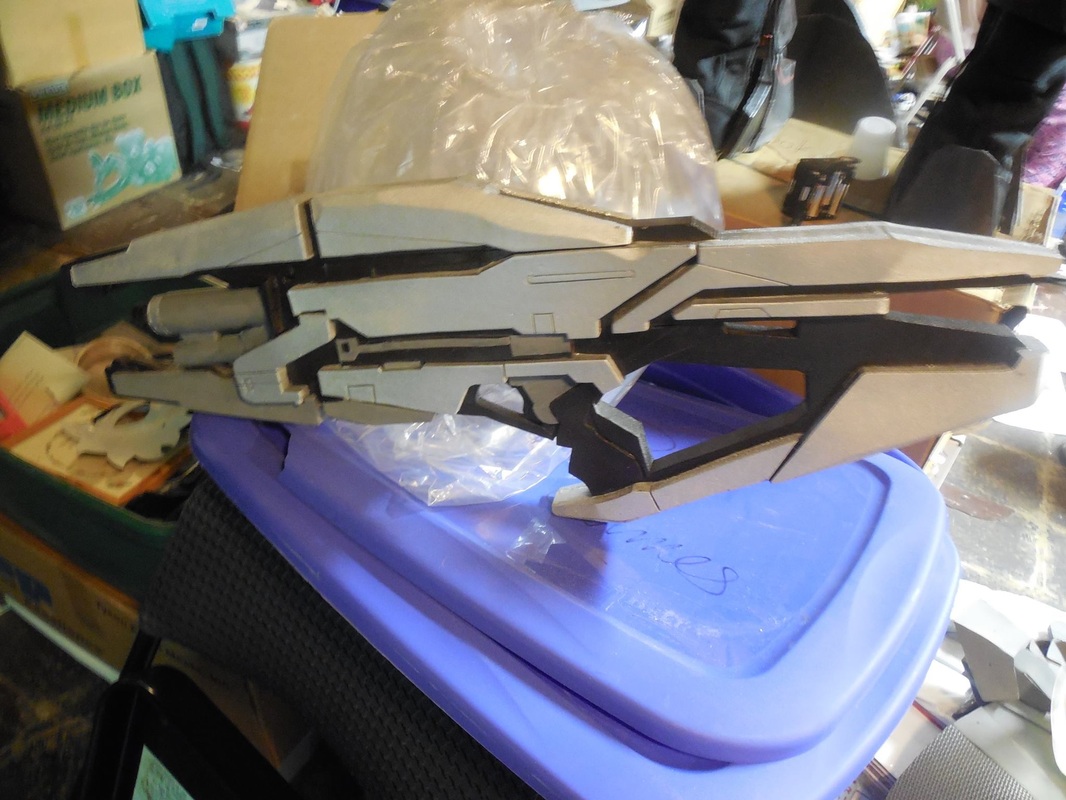
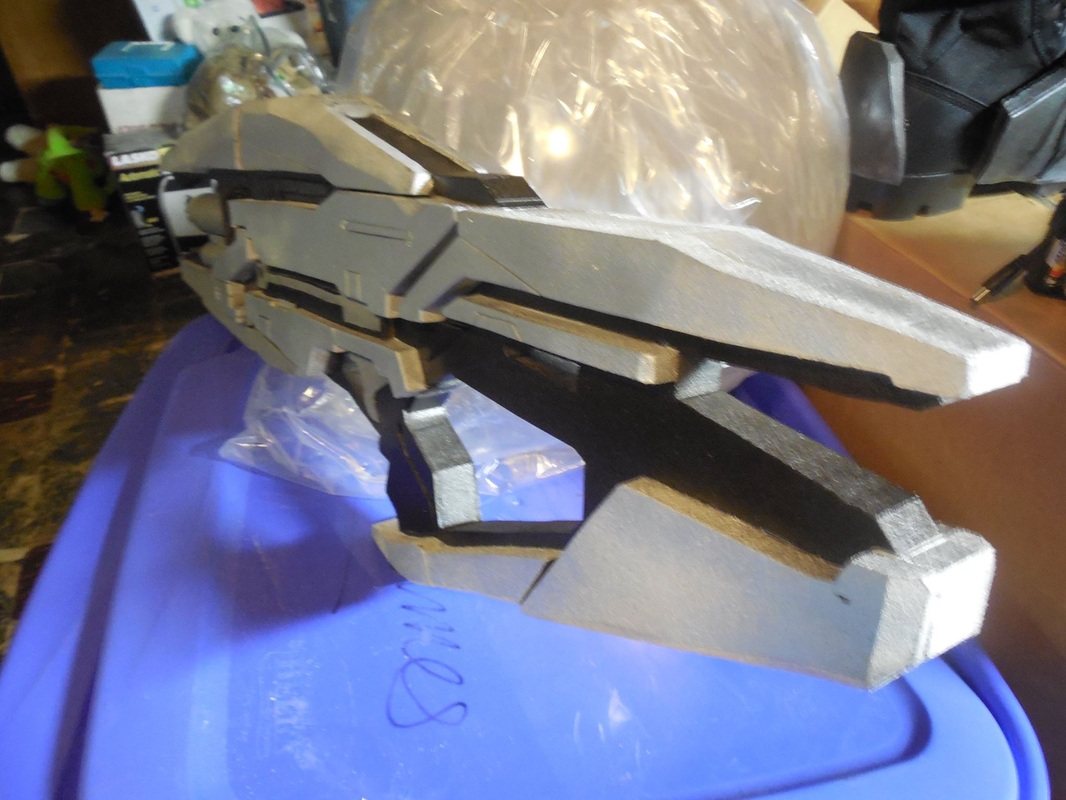
 And now, back to the awesomeness that is the Turian Phaeston. I built this to go along with my Terminus armor, though unfortunately I ended up having to sell it to raise some money to move my family BACK to Utah, after having been in Pennsylvania only six months. Two moves in one year, both cross-country, have really done a number to our already drowning finances. :( Still though, it was a fun build, and I know it's gone to a good home. I'll make another one once I get all my stuff back from the storage pod everything is living in. Onward! Started this one, as always, scaling and printing a massive version to use as a template. 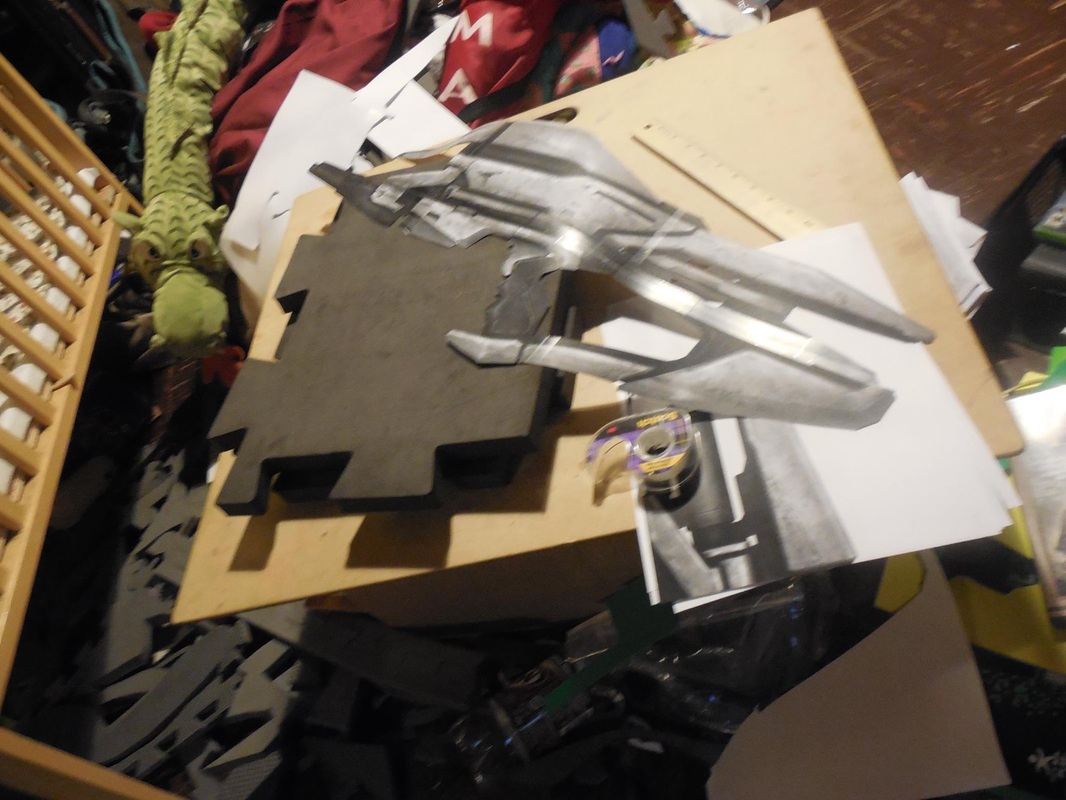 Decided to go the same route as I did with the M8 Avenger version 3, with the 1" thick foam as the core, and the other foam as build-up layers. Had to cut it out in three different pieces though, due to the small sheets of foam you can see above. Got it all cut out though, and used the contact cement to glue it all back together. 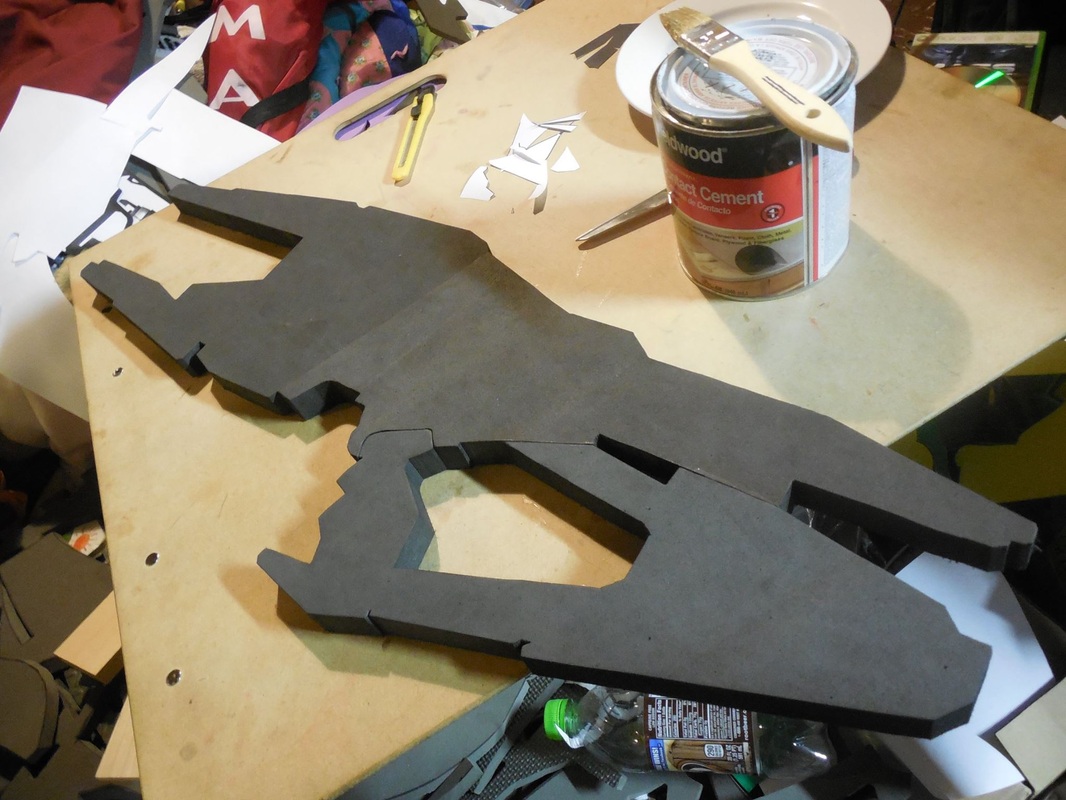 From there, I cut the paper template into smaller pieces, using them to prep the rest of the foam. I traced these onto 1/2", 1/4", and craft foam, to really give it a nice layered effect. The subsequent pile was quite a sight. 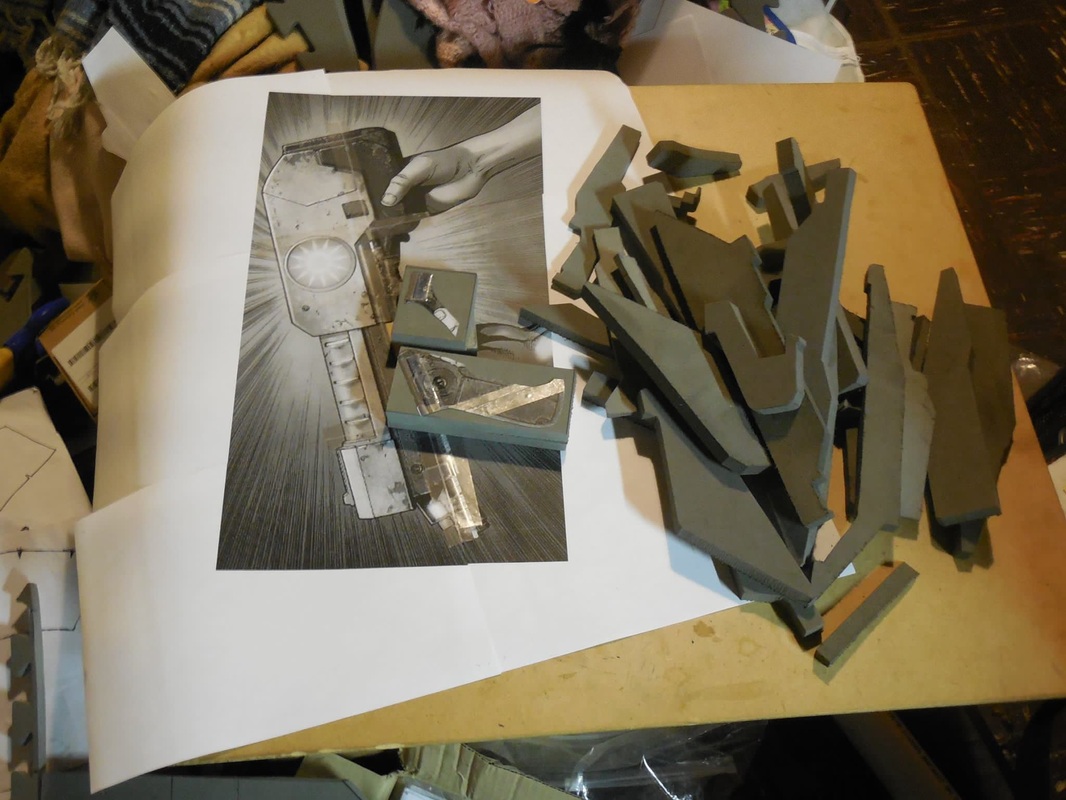 (Heads up - I did a lot of the Phaeston at the same time as Star Lord's pistol, seen on the left, so you'll see a bunch of pictures of them together as we go along. I'll write-up the pistol next, to help stave off any confusion if I can.) Once all the pieces were cut out, I arranged them to ensure they fit on the core, then slung contact cement everywhere and put everything together. 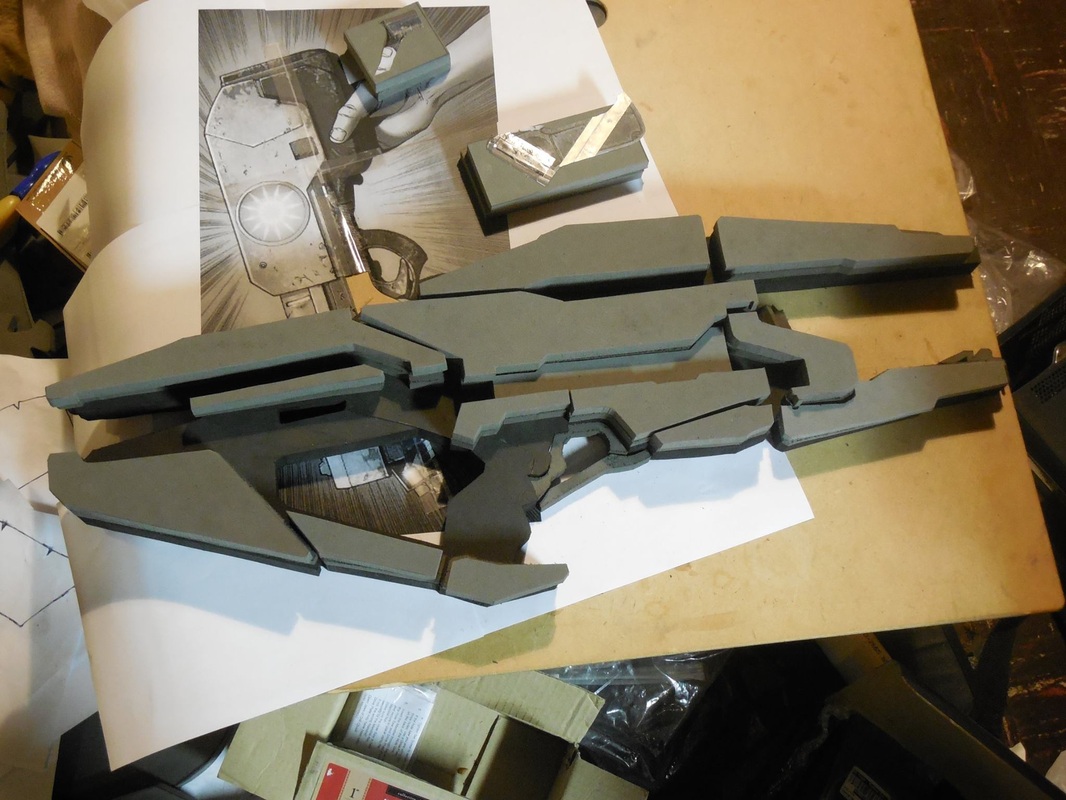 Then I threw on all the craft foam, to give everything the final feel. 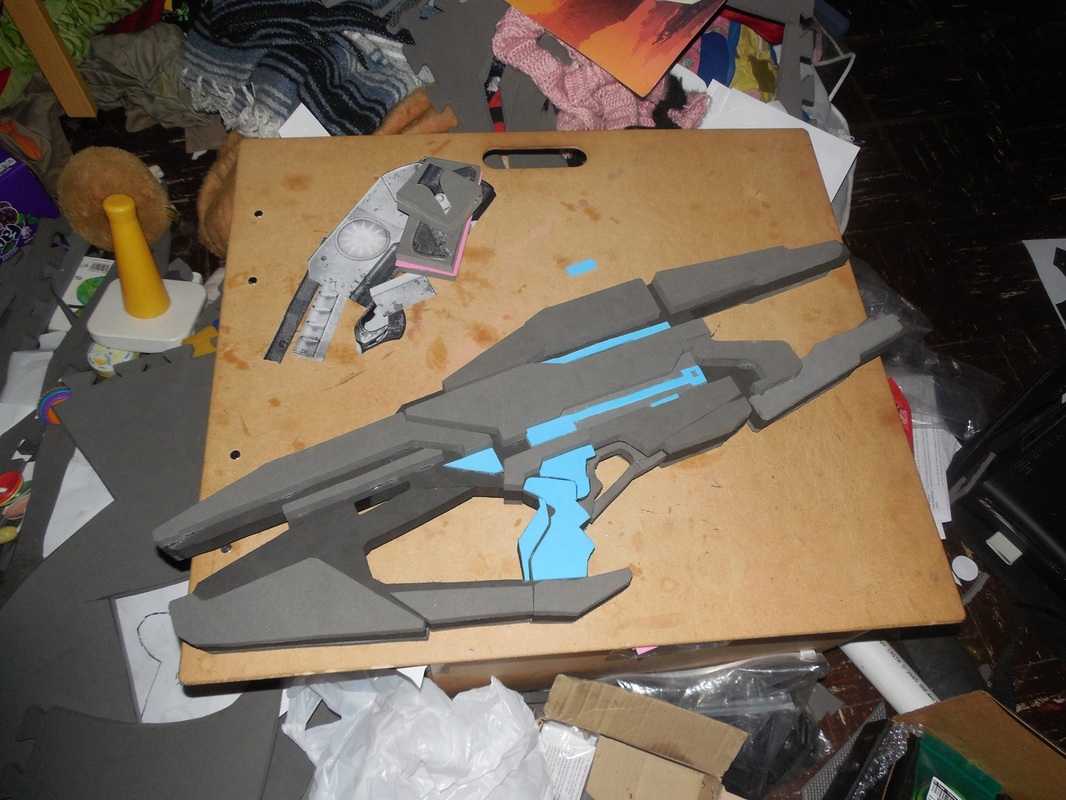 Next came the tricky part. I had to angle the top section, the rear of the stock, and the base of the grip, as well as bevel some of the edges. So, I took it out to the belt/disc sander, and got to work. While I was out there, I also cut out the barrels and final pieces, and used the puck left over from cutting out the hole in Star Lord's pistol to make the extended chunk of the Phaeston's main barrel. 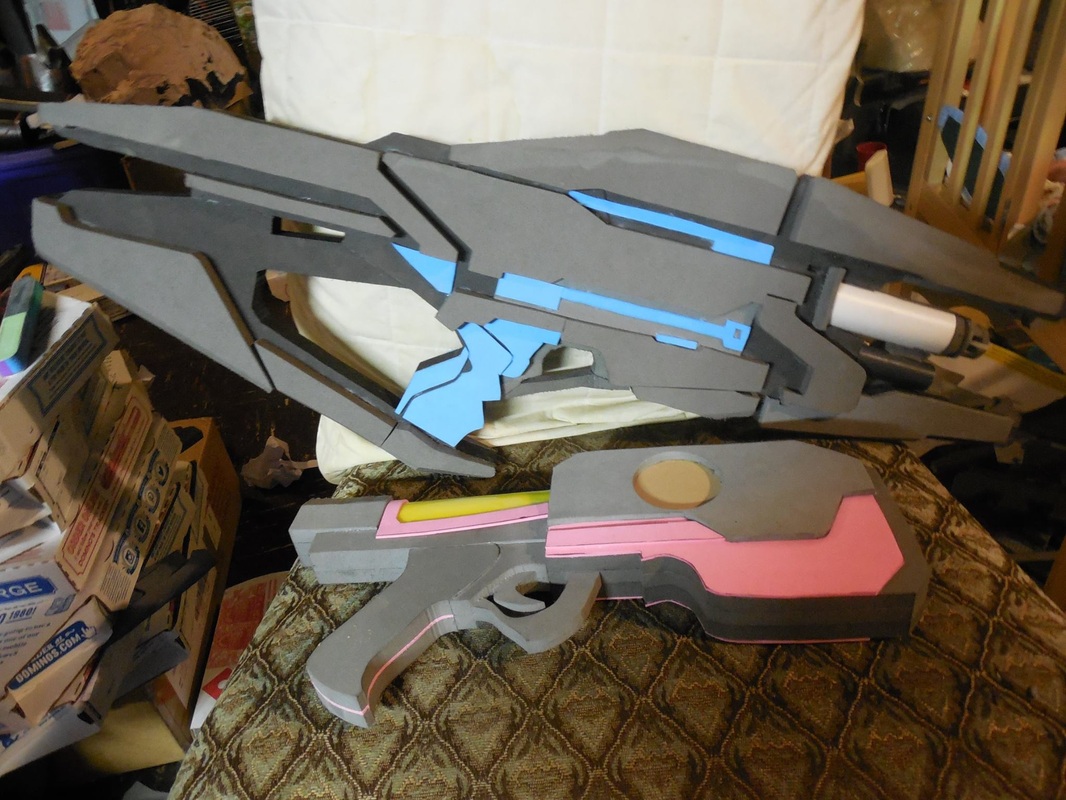 After some cleaning up, I then took my xacto knife and heat gun to it, and etched in all the detail lines. 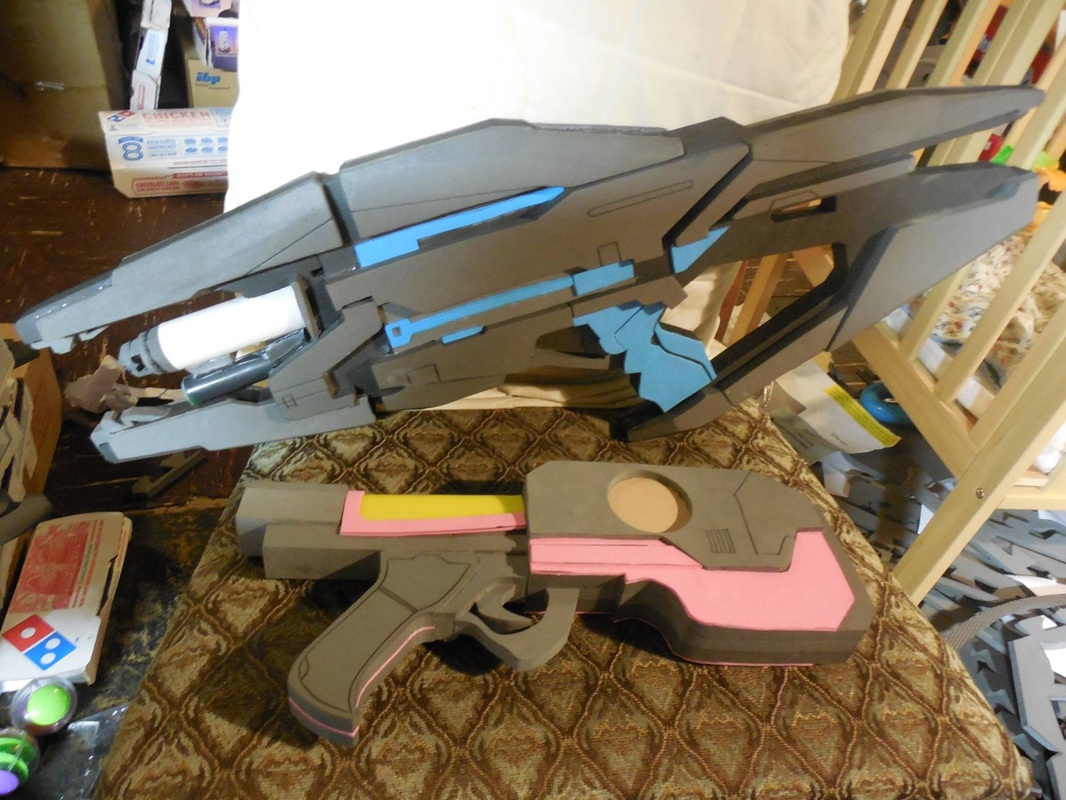 Once I was happy with everything, it was time for everyone's favorite thing, Plasti Dip! I followed that up with a coat of silver as well. Originally I was going to do a custom color scheme with it that was similar to the Terminus armor, but I was worried that it would blend too well with the armor and it would get lost in it. Instead, I stuck with the original coloring to have it stand out on its own and compliment the armor. 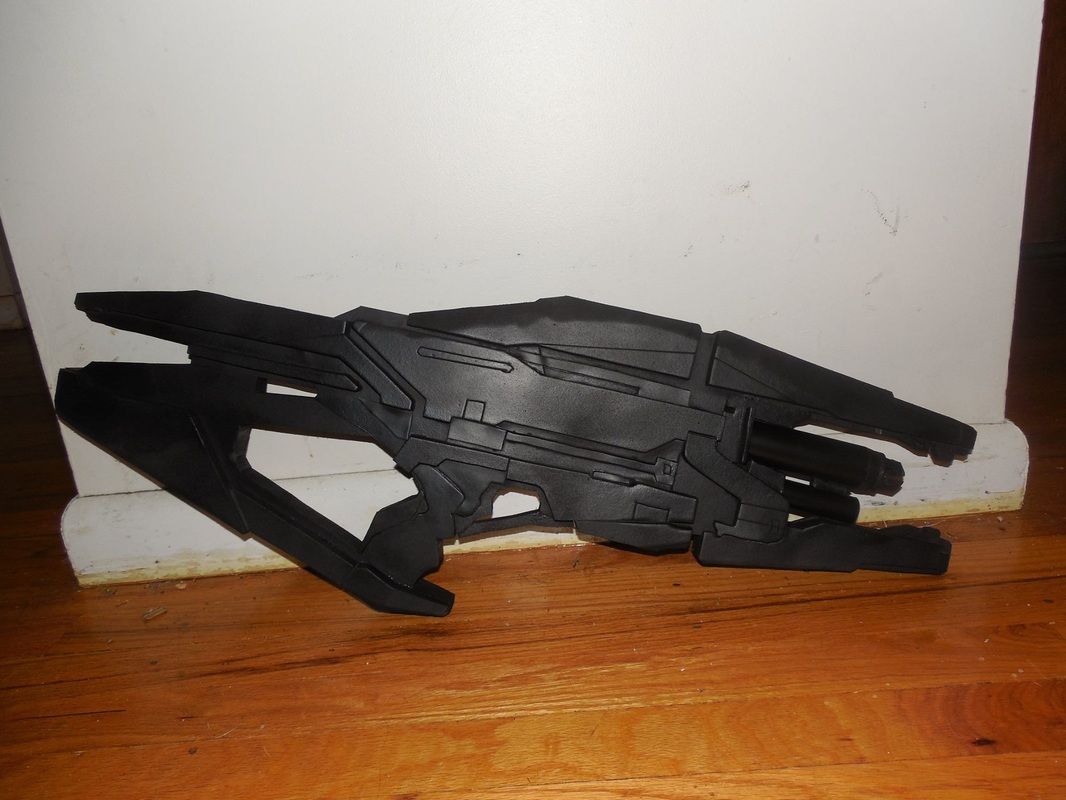 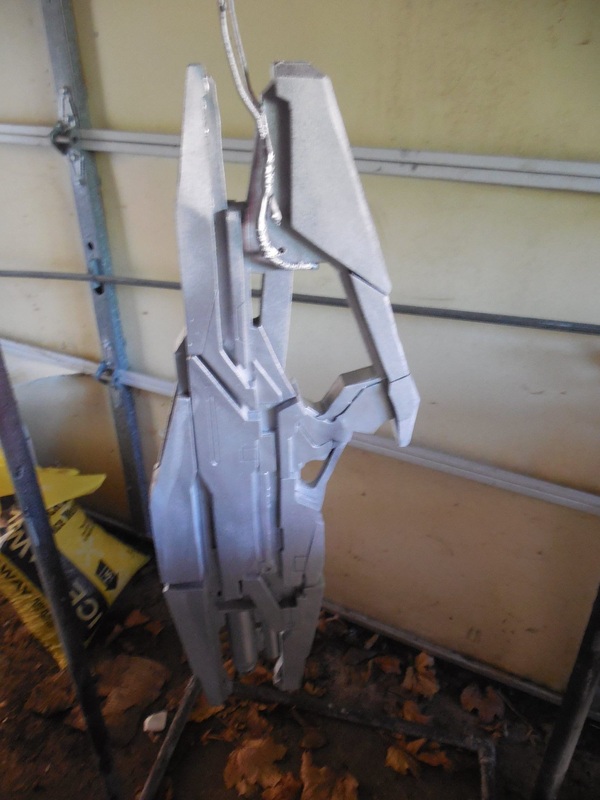 'Course, that ended up not mattering, since I ended up having to sell it, but oh well! Still looked awesome. Taped up everything, then threw on the same metallic black I used on the Terminus. After that I painted on an acrylic pewter, which is what I normally use on the M8. This helped give some contrast to a few of the lower layers and the barrels. And last, but definitely not least, came the weathering. As per usual with the silver, I did a black acrylic wash, with dry brushed highlights over everything else. 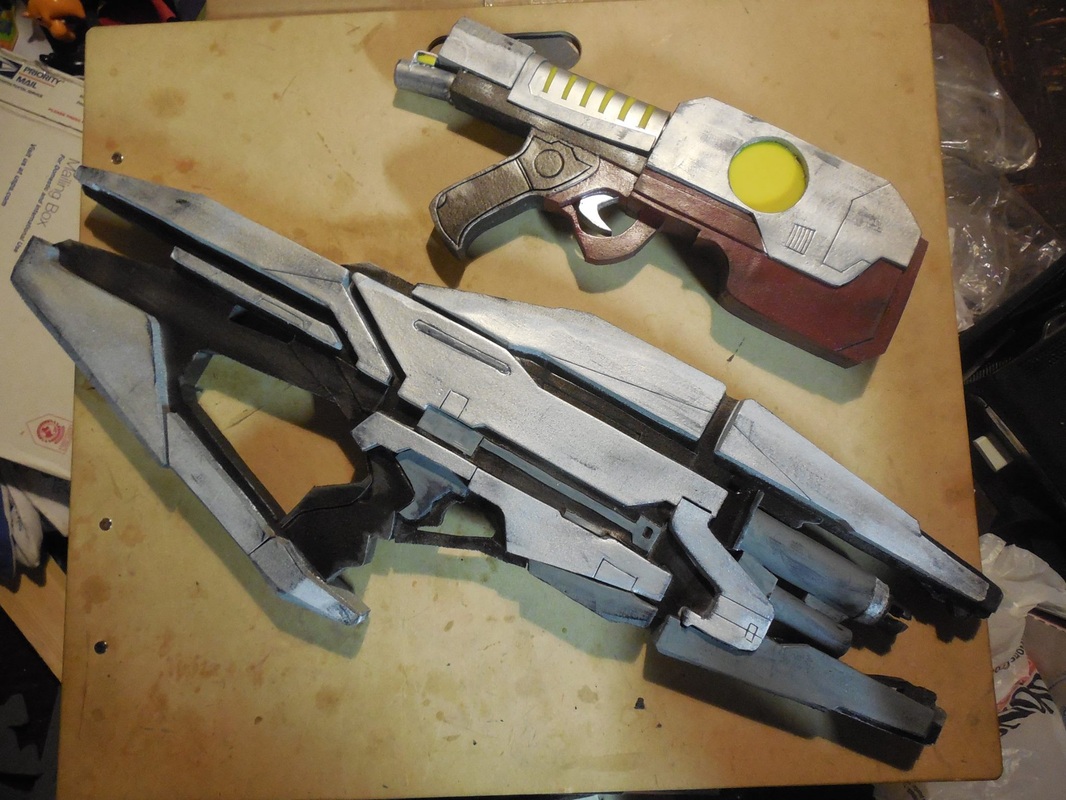 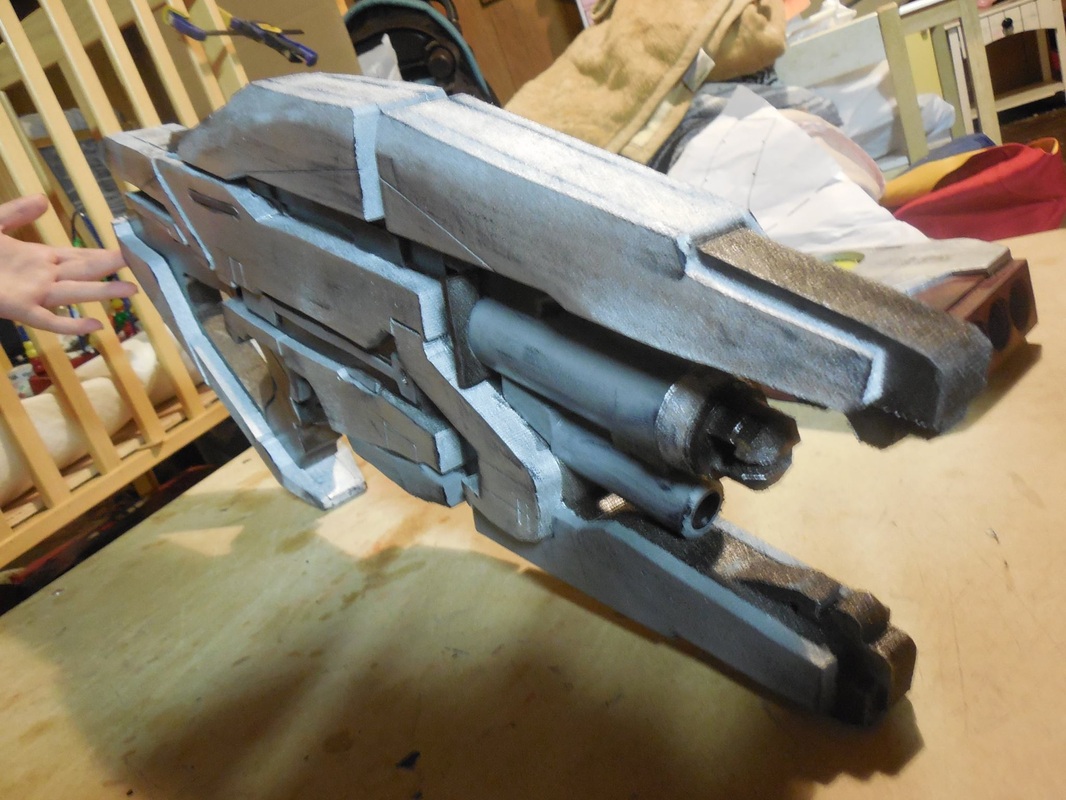 I'm really proud of this build, and sad to see it go, but such is the way of things. At the very least, I know what to watch out for when I make another one! :)
Check the Terminus Armor build for some awesome shots of the two together! Also, while you're at it, take a look over here and vote for me! Contest runs between August 18-28, 2014, and you can vote once per day. Appreciate it!
2 Comments
 Yes, yes, I know: the title says Paladin, the picture says Carnifex. The two guns are 100% identical, besides the paint and decals though, so I'm sure you'll forgive me this slight oversight. ;) Anyway, got commissioned to do an M77 Paladin out of foam. Relatively simple, though due to all the open areas in the middle of the gun, I opted to try out a different method. 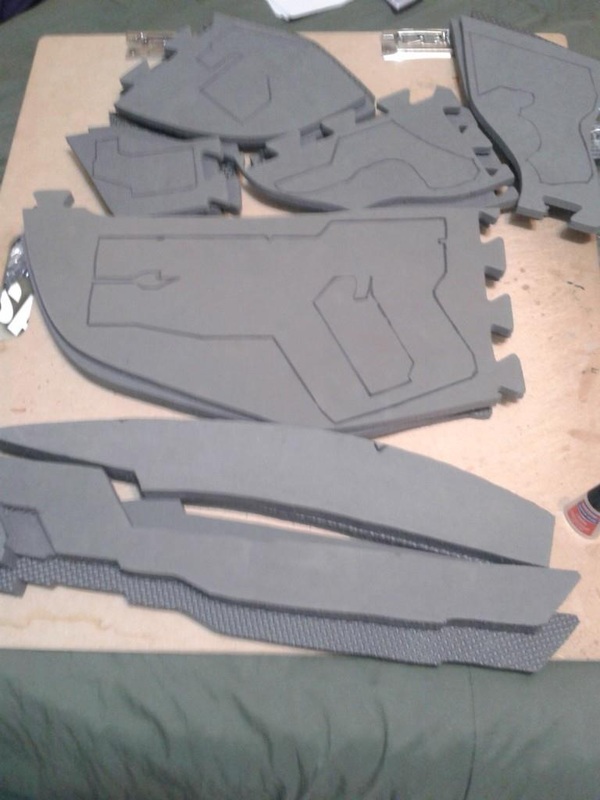 In the pile of foam at the top of the picture, you can see I'm still layering it to cut out all together, but it's a little more puzzle-pieced than the other two regulars you see below it. Makes it much easier to get to all the holes inside! Once all those layers were glued down, I cut out the puzzle pieces, glued them all together, then used the extra to cut out the small bit at the bottom of the grip. 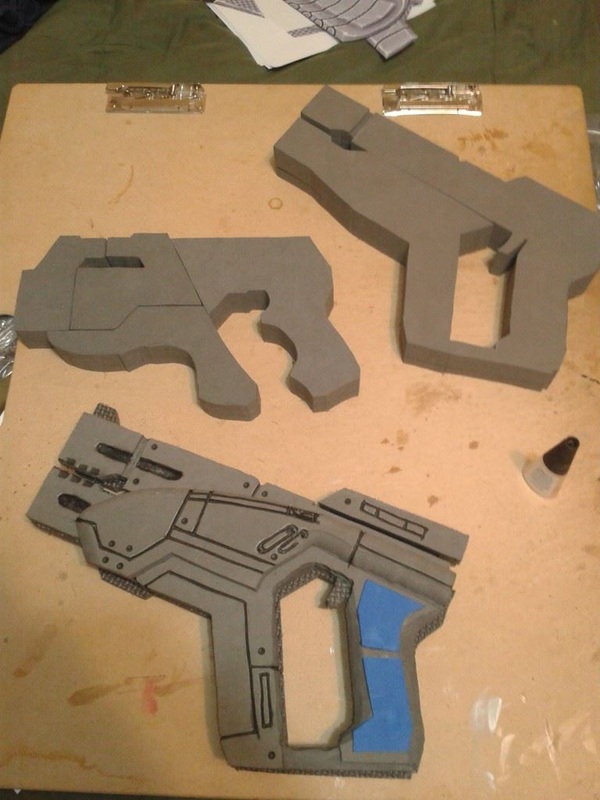 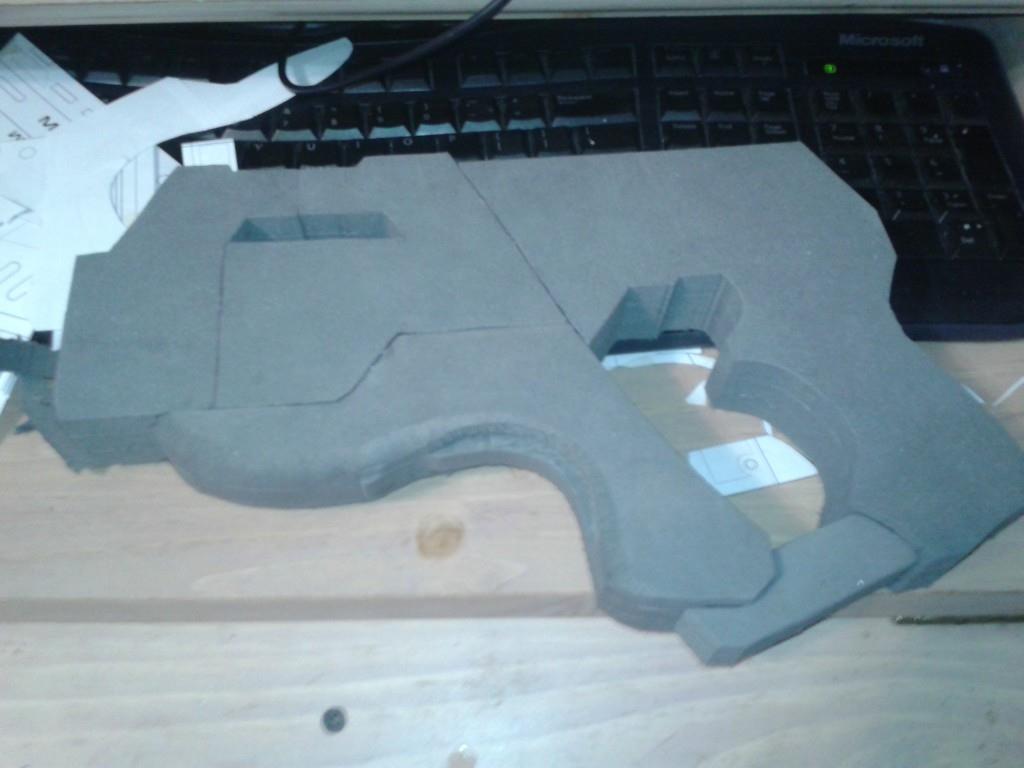 Super simple. It's remarkable how quickly this came together and how simple it really is. After assembly, I grabbed my craft foam and cut out the top layer. 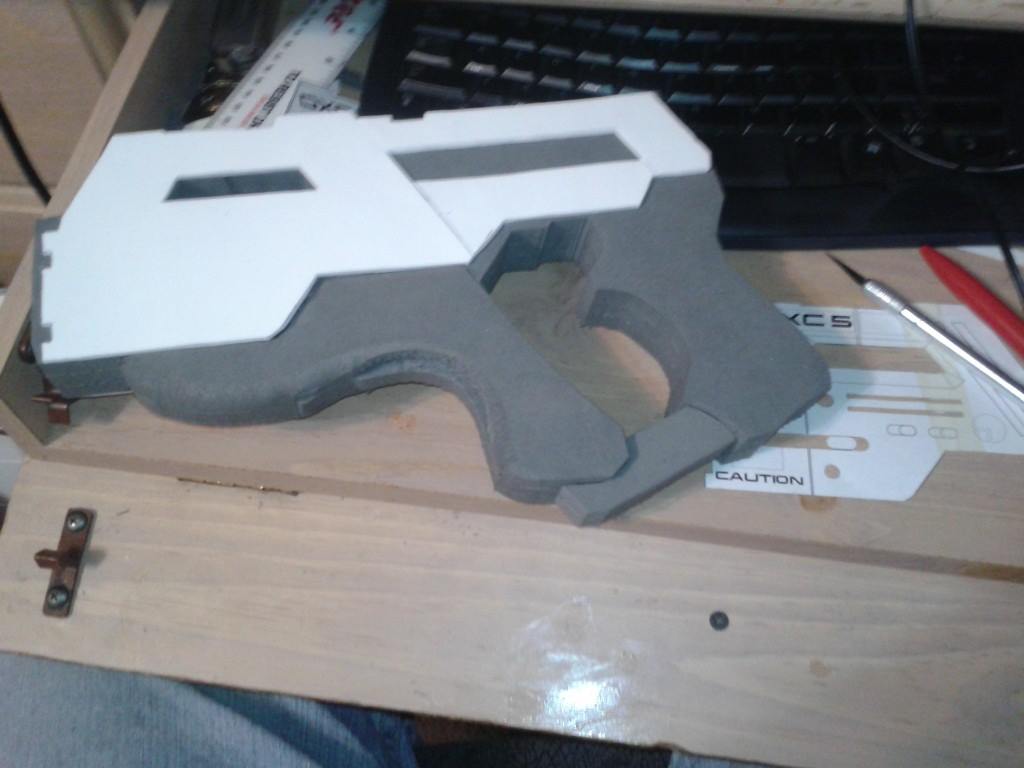 Then, I did the light scoring trick with my xacto knife and heat gun for all the details, after marking all the lines with a pen, and cut out the angled bit on the upper hole with the xacto as well. I also threw on the upper details with more craft foam, and cut out the barrels, and heat sink on the back out of PVC pipe. I covered the back of the heat sink with more craft foam. 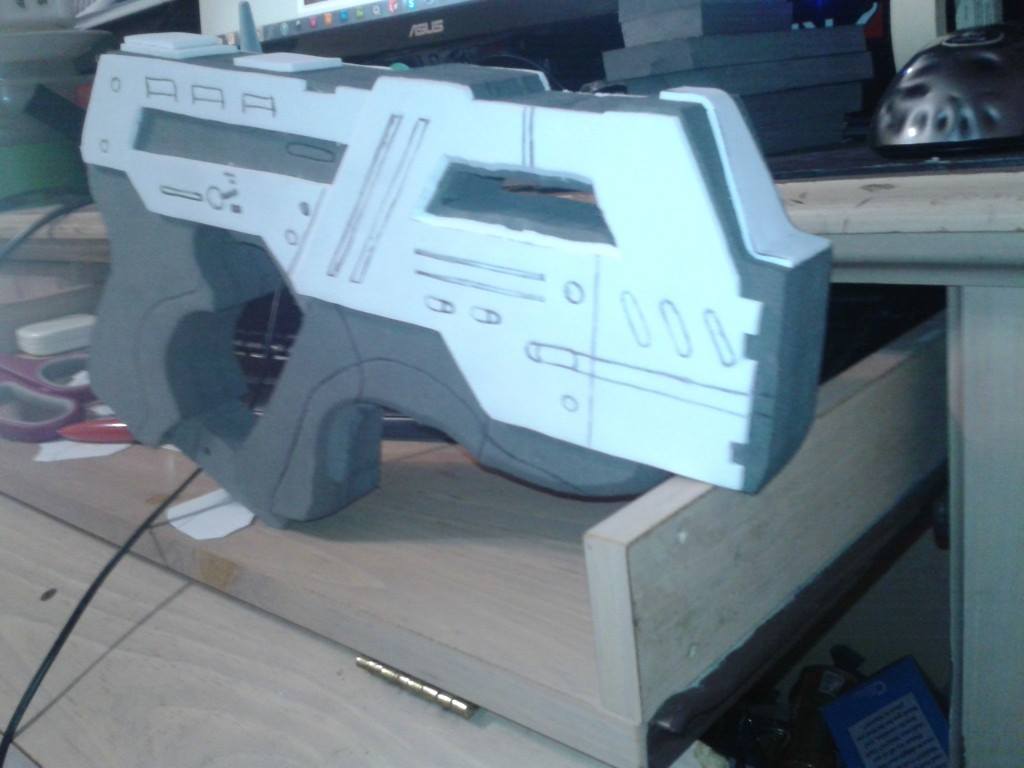 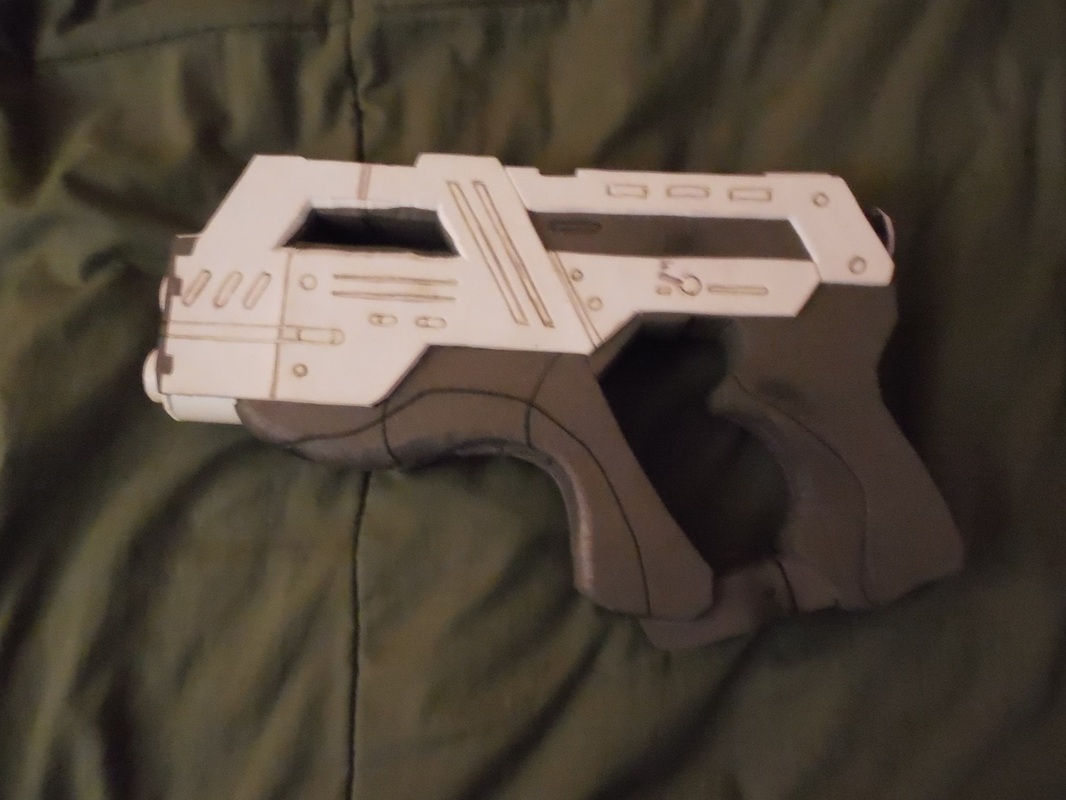 Next came the Plasti Dip! Lather, rinse, repeat. Oh, and, naturally, the paint and weathering. ;) 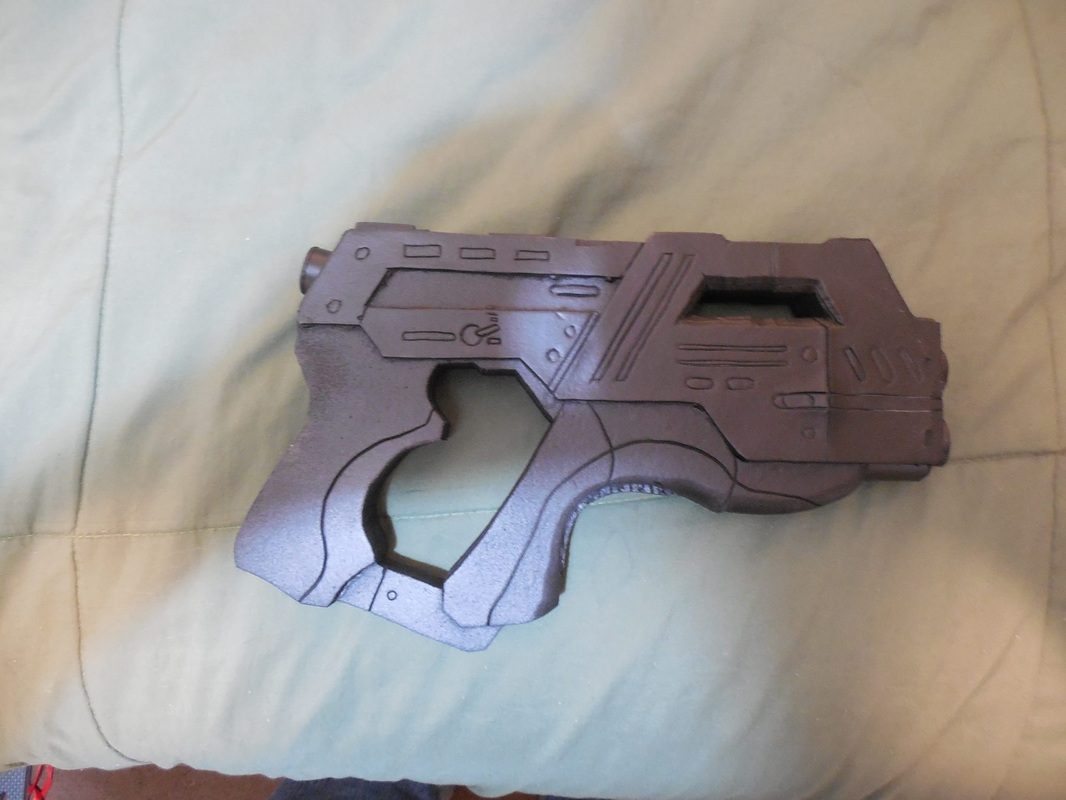 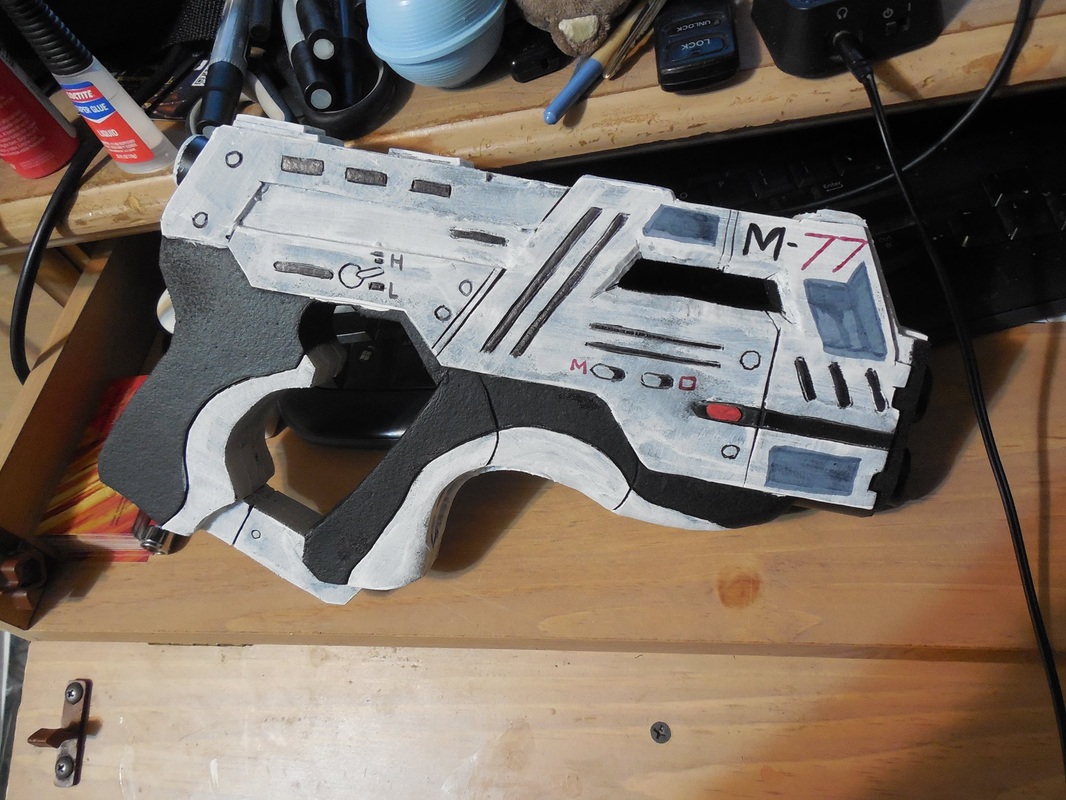 I was both surprised and happy at how quickly this build came together, and I can definitely see why most people start out by making this or the Carnifex. I'm super tempted to make a wooden master and mold a few, though there are already so many out there that I don't think it'd go anywhere. Still though! :D
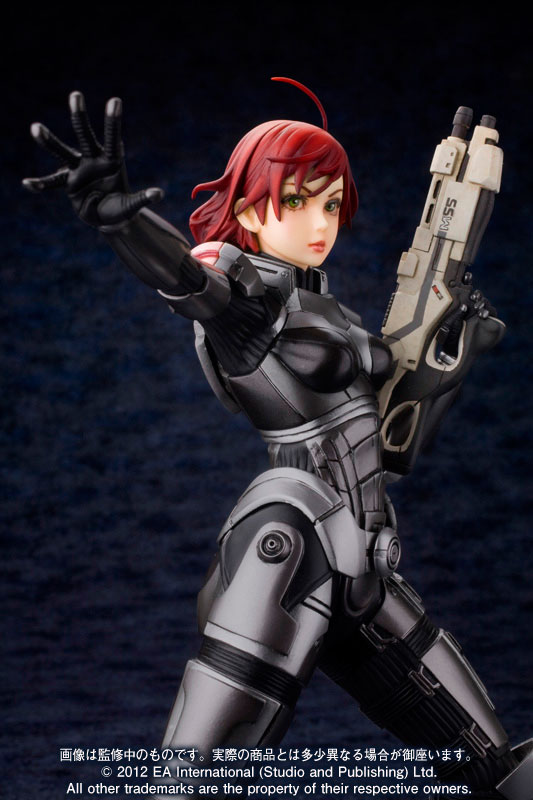 Shortly after finishing the first set of Female N7 armor I've ever made, I was commissioned to make a second set. This one was special though, as it was going to be based off the Japanese bishoujo statue that had recently been released. Super sleek, very clean, and very metallic. Due to the sleek look, I had to make some changes to the overall patterns. I also didn't want to use craft foam for the raised sections on the thighs, back, or anywhere else I could get away with it, just to add to the look and also not have to use as many parts. To start, though, since the design was based off the ME3 look, I decided to start on the shoulder bells.  You'll notice that, like with the Terminus armor, I used the smooth side of the foam exclusively. Since the statue was entirely smooth, I didn't want to change that look at all.  Connecting the bell pieces together was remarkably easy, though heat forming them to the proper shape was an experience. I couldn't bend them too far, lest the glue separate (this was before I knew about contact cement, I was using super glue), which meant they continually tried to revert back to a flatter shape if I didn't get them quite hot enough. You can also see my latest attempt in getting the elbow diamonds to look cleaner. 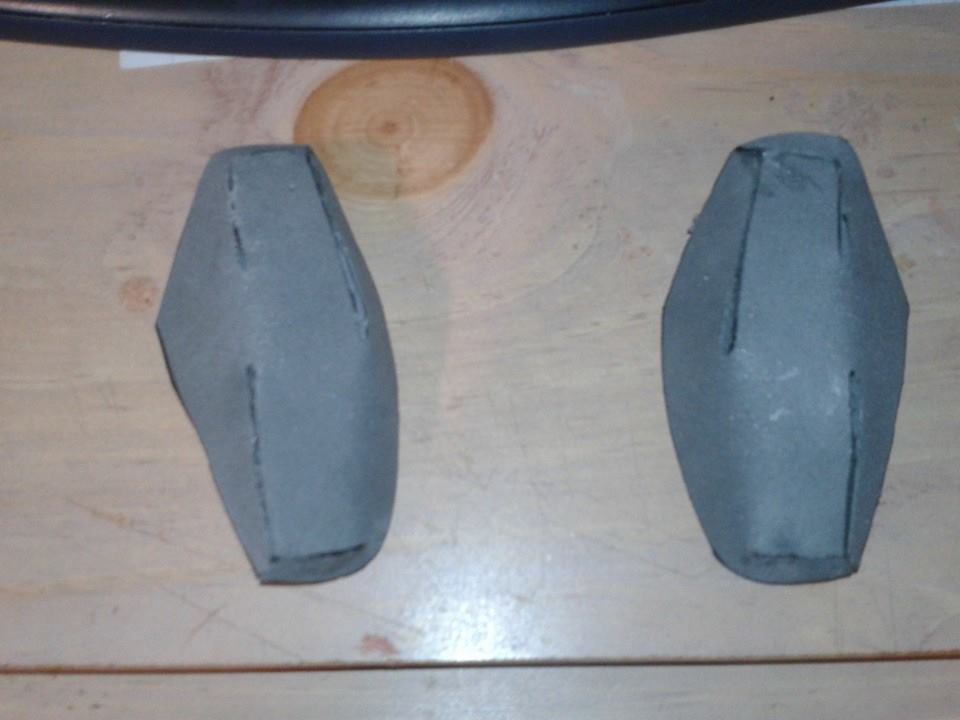 Once those were ready, I finished the rest of the arm pieces and got to work on the legs. The hip section was definitely the most interesting to make, since they were basically made out of the same piece of foam. I would cut out the base layer, use a hobby knife to cut out the next layer from the base piece, then again for the top layer from the second. I then raised each section slightly, and glued them back together. I also cut out the belt section, which would attach to the top of the hip piece. 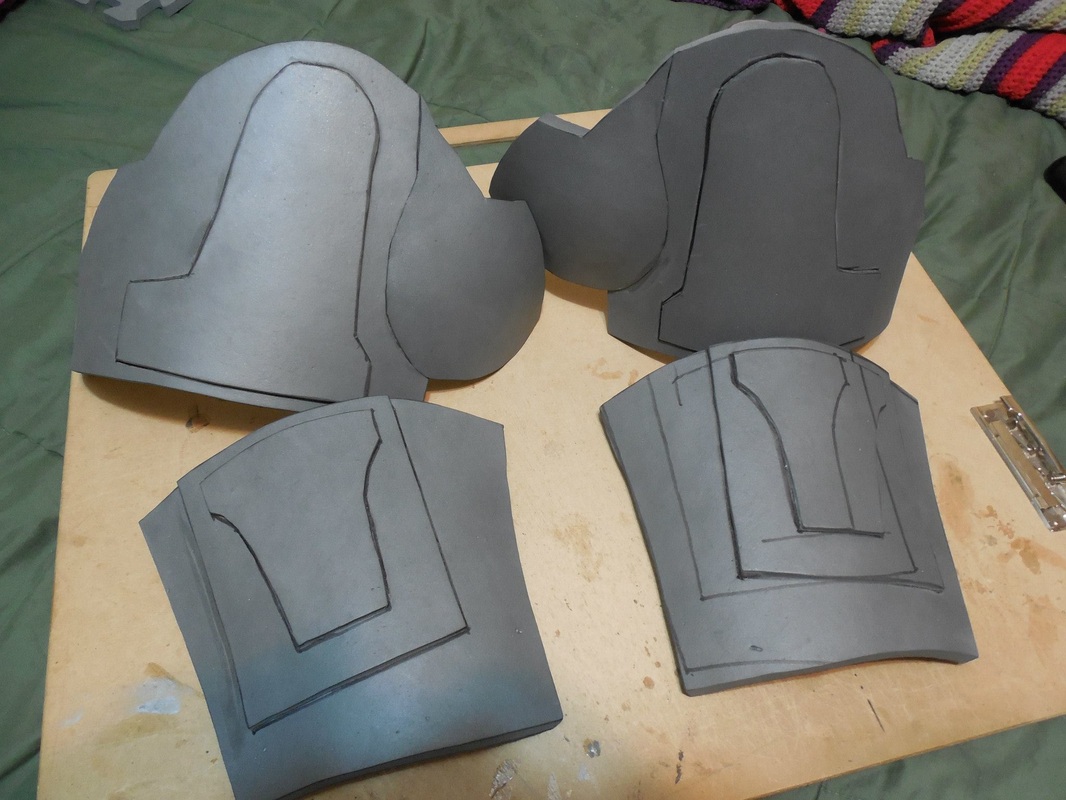 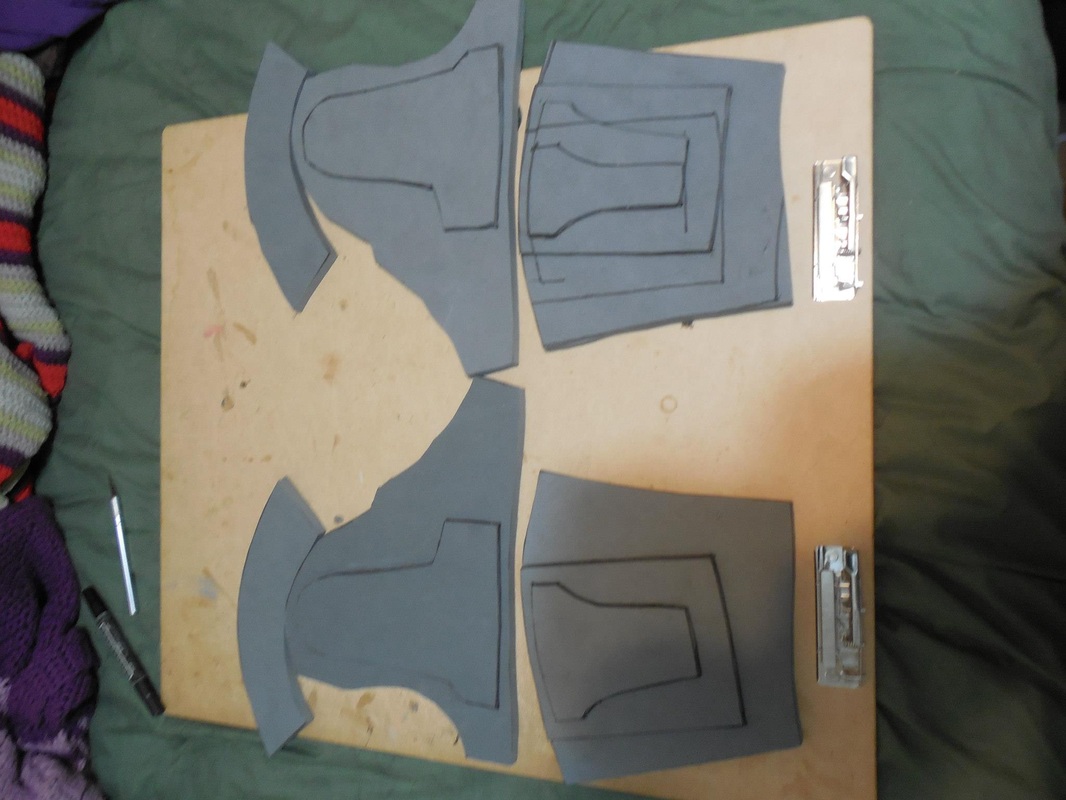 After that came the shins. I cut out a large piece in kind of a cone shape, to form to the leg muscles better, then attached the knees. I also cut out the coolest pieces of the whole build: the shoes. Once those were done, the torso came together as quickly as ever. 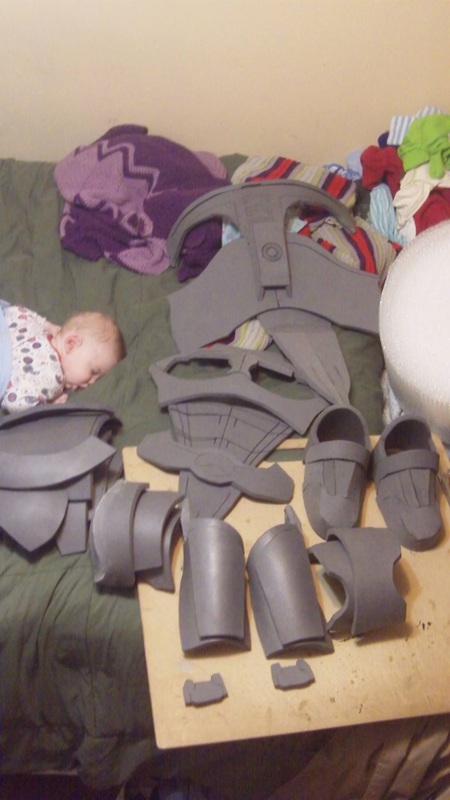 (Sleeping baby photobomb!) Finished up the chest piece, and the weapon/shield thingies, then Plasti Dipped everything.  Given the metallic sheen of the whole armor, and the multi-colored layers, I opted to go through each piece one by one, painting then taping and repeating. The progress shots of the shoes show the whole process each piece went through. First, I sprayed a black metallic: 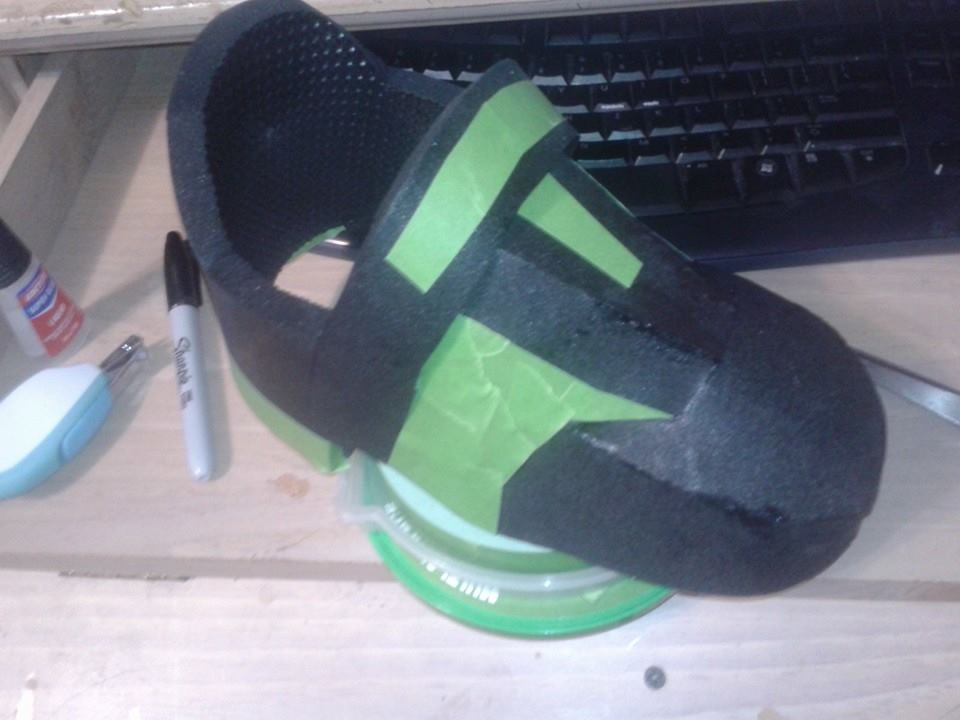 Then after it had set I taped off the sections that would be remaining black. Next, I sprayed on the darker grey, waited, and taped it off again. Last came the silver: 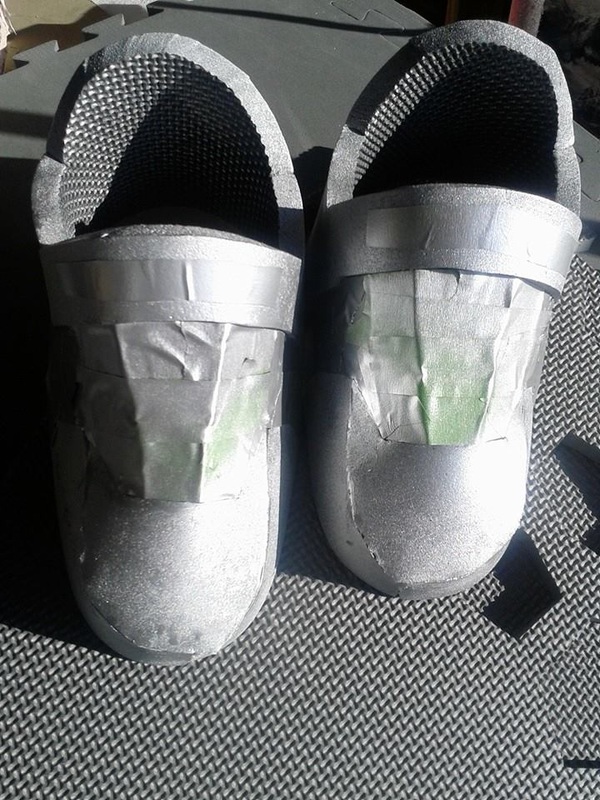 And more waiting. Of course, while it was drying I would move on to another piece, but I didn't have much room so even then goings were slow. As always though, the wait was totally worth it. 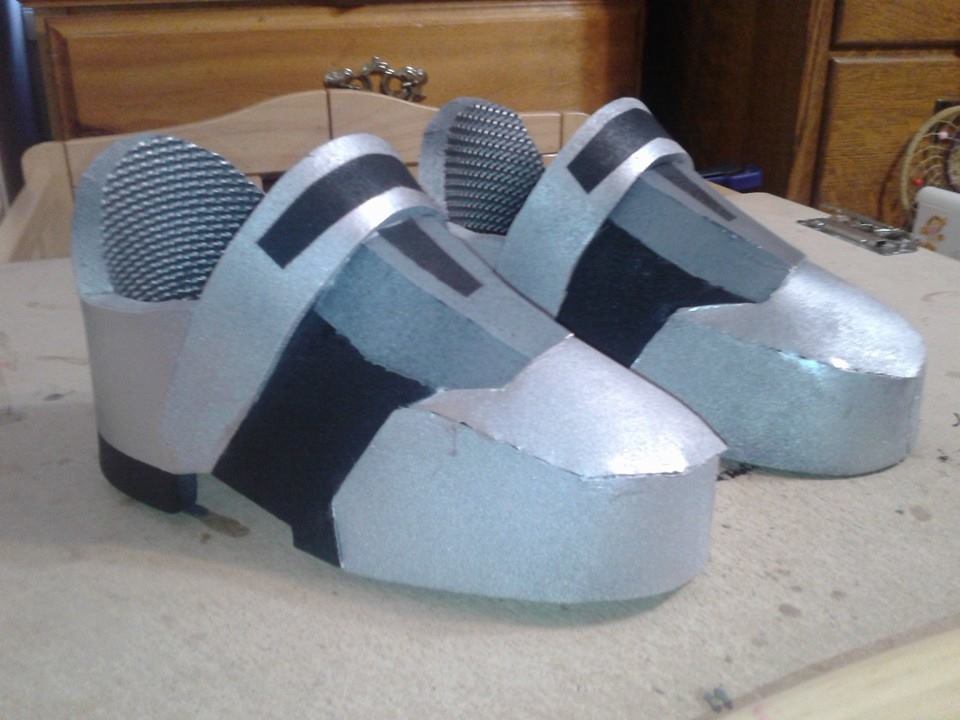 After I removed all the tape, I would hit it with a coat of adhesive promoter, a clear spray that helps everything keep from rubbing off too quickly. Since the statue's armor was smooth and sleek, I ended up not weathering anything to keep with that same look. Each leg piece went through basically the same process, which was easier as I went up each layer and taping off the layer below. 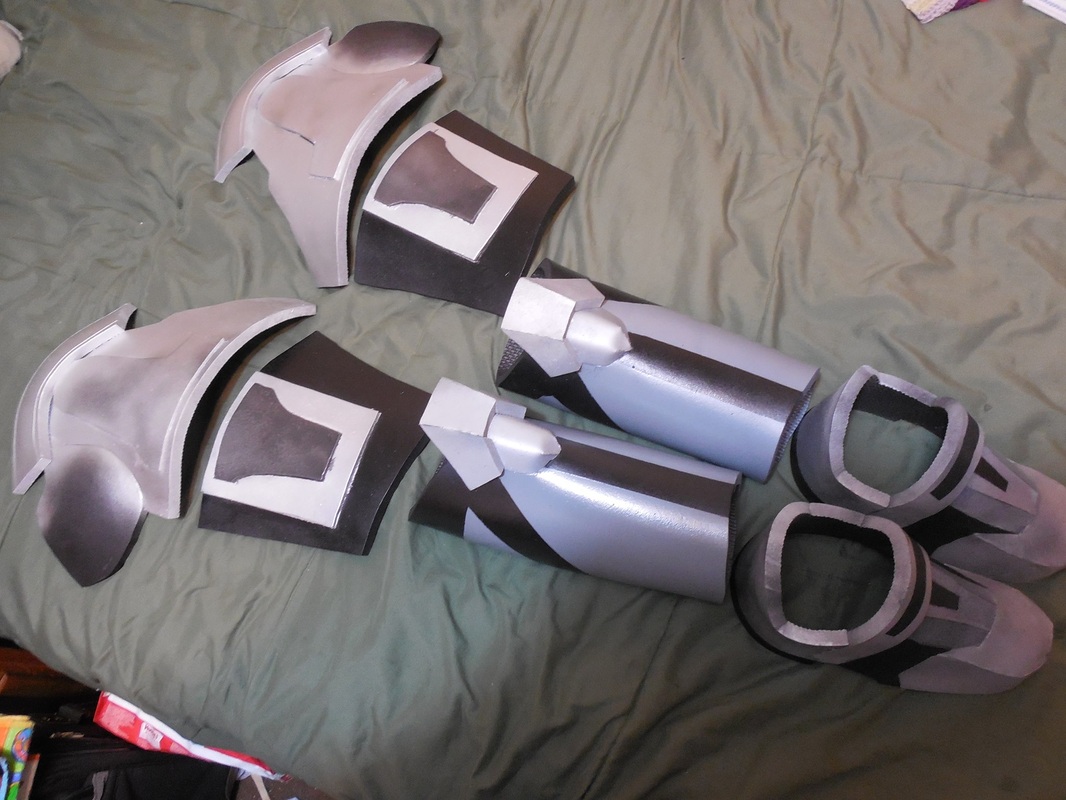 The arms were simple as well, since they were pretty much the uniform dark grey. 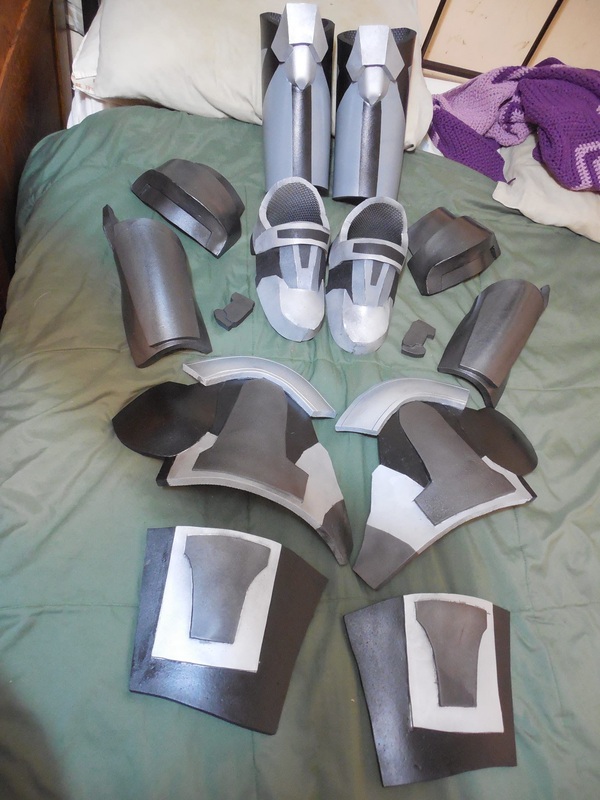 Of course, the right arm needs its telltale stripe! Rather than the standard white/red, the statue sticks with the silver/red, so that's what I went with too. First came the tape, then the base silver. 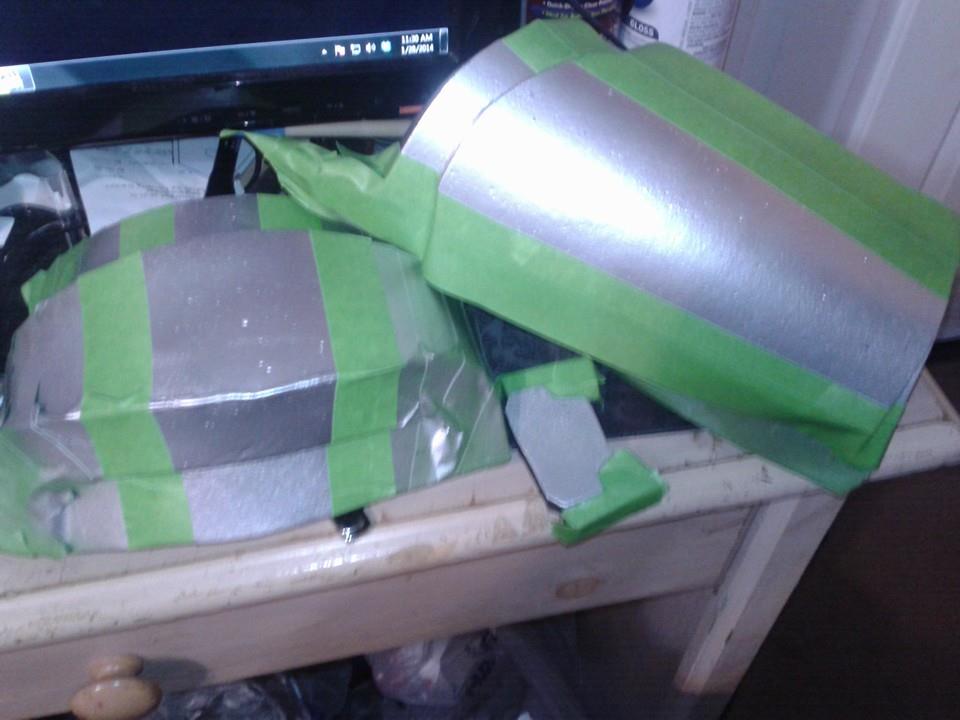 Then wait, then more tape, then the red. Nice and straight forward. 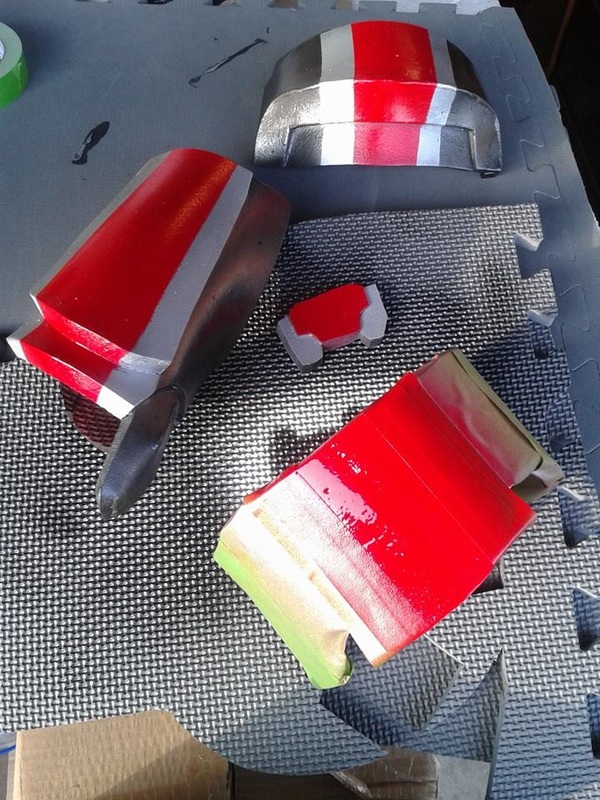 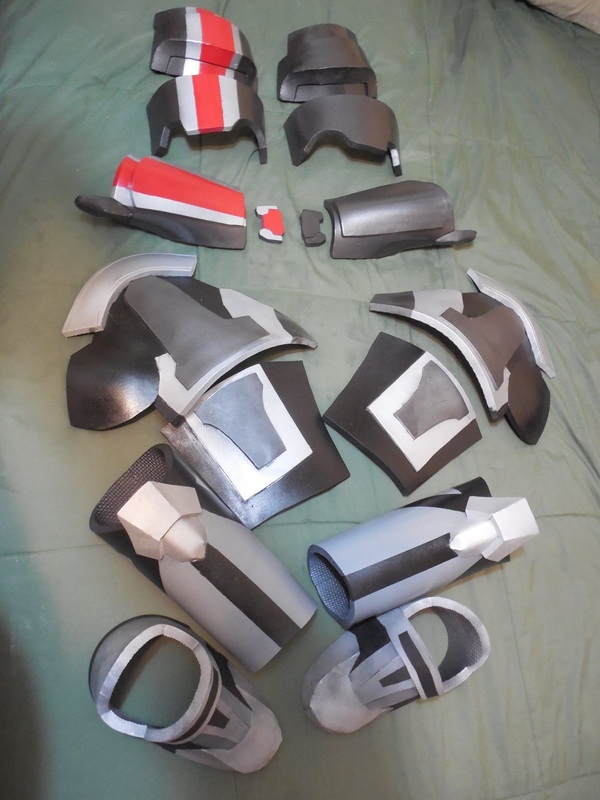 And, finally, I taped up the torso and did it all over again. Third shot kinda has a nice, super-heroine look, doesn't it? :) Well, all that was left was strapping, but at this point I revealed on my Facebook page the overall design. Seemed to go over pretty well, which was a relief! I had been second guessing myself at the brightness of the colors, but everyone seemed to like it anyway. 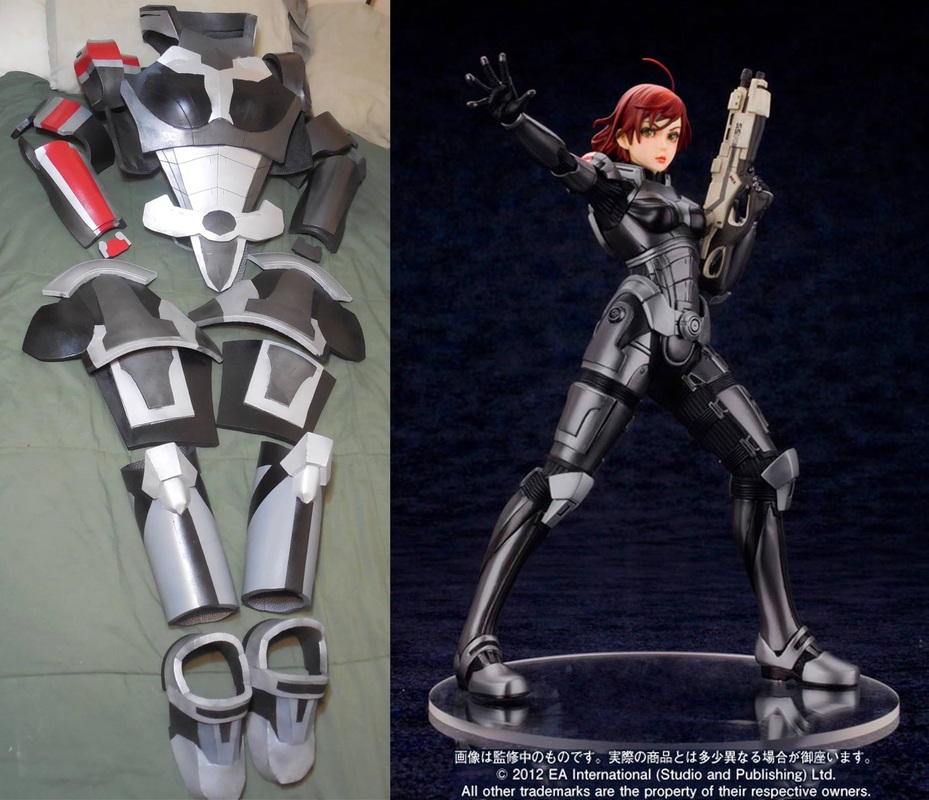 Unfortunately I had to rush to get the straps on and send it out, so I've only got one other progress shot left to share. For reference, though, I attached elastic bands on the insides of the biceps, to make it stay on comfortably but to also be easy to remove. I also kept the hip sections separate, attaching the upper ones to the belt and the lower ones just to the leg, to facilitate movement. Other than that, just the regular side straps and belt on the torso and wrist strap on the forearm, again leaving room for adjustment by the client once they received it. 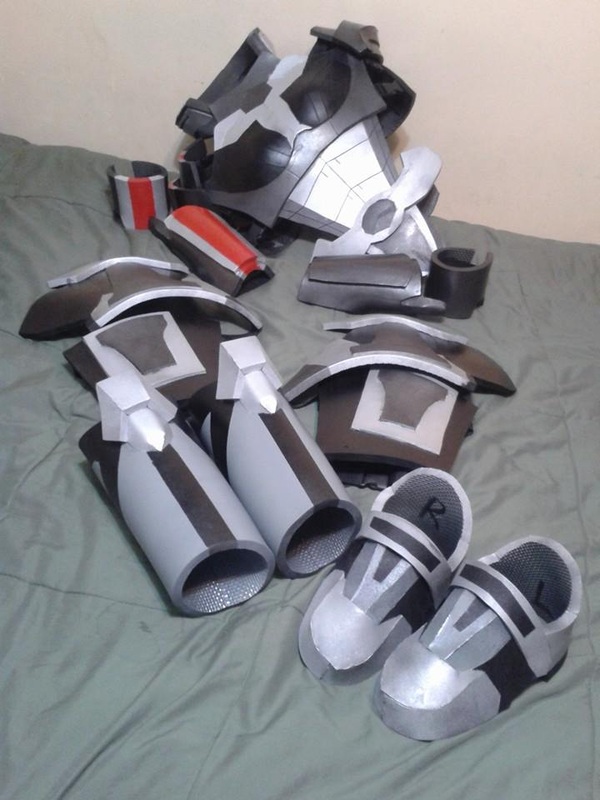 I think it turned out pretty well, considering, though if I did it again I'd make some changes to it. Still, it's pretty close to the statue at least! :)
 Those of you that have been following me for a while know that I've made quite a few sets of the Male N7 armor, but I had never done the Female variety. That changed recently when I was commissioned for the FemShep set. Much of the pieces are identical to the BroShep armor, so I won't go into a lot of detail of the patterning/tracing/cutting. Some of the pieces are shaped a little different, of course, but only a few pieces (some obvious) are different: the chest plate, the hips, and the shoulder bells. 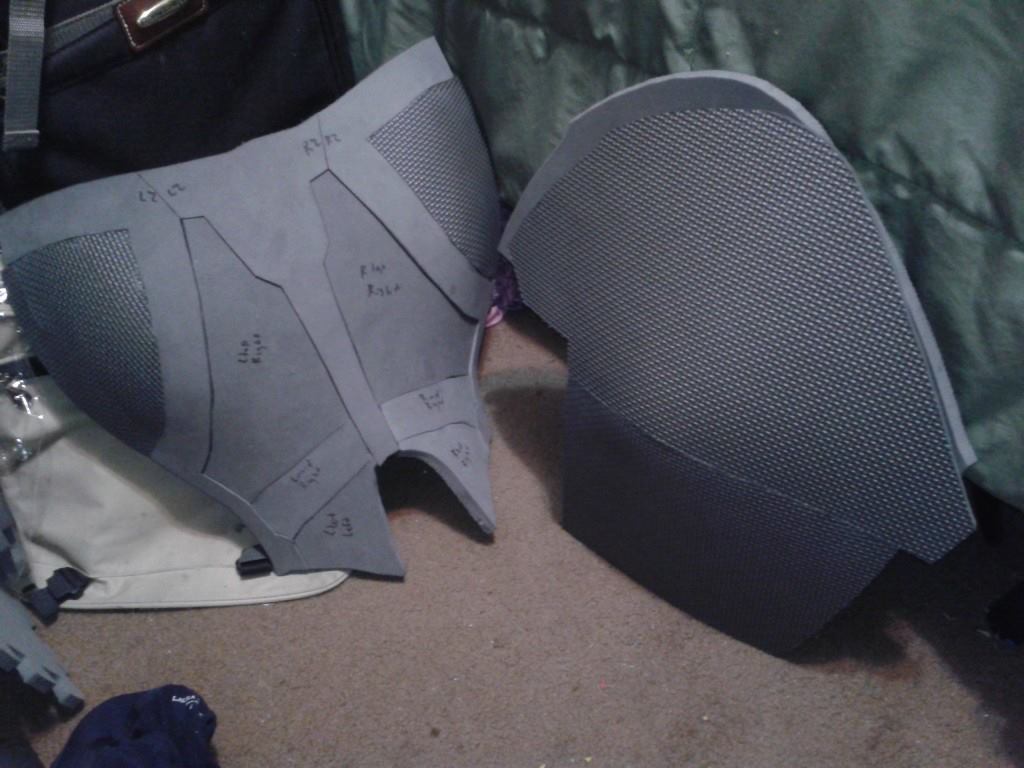 The legs, as you can see, are still pretty much the same. You'll see a difference in the details on the hips as we go, though. The biggest difficulty, naturally, was the chest plate. While I had the measurements I needed, I still needed to make sure it was shaped properly, there was room for adjustment later, and everything needed to look even. I cut out the pieces for the main section, then used a heat gun and a hard, rounded surface to shape a couple large pieces of foam. On these I traced the shape of the open areas of the main section, and was able to cut out the now properly shaped breast pieces and attach them. 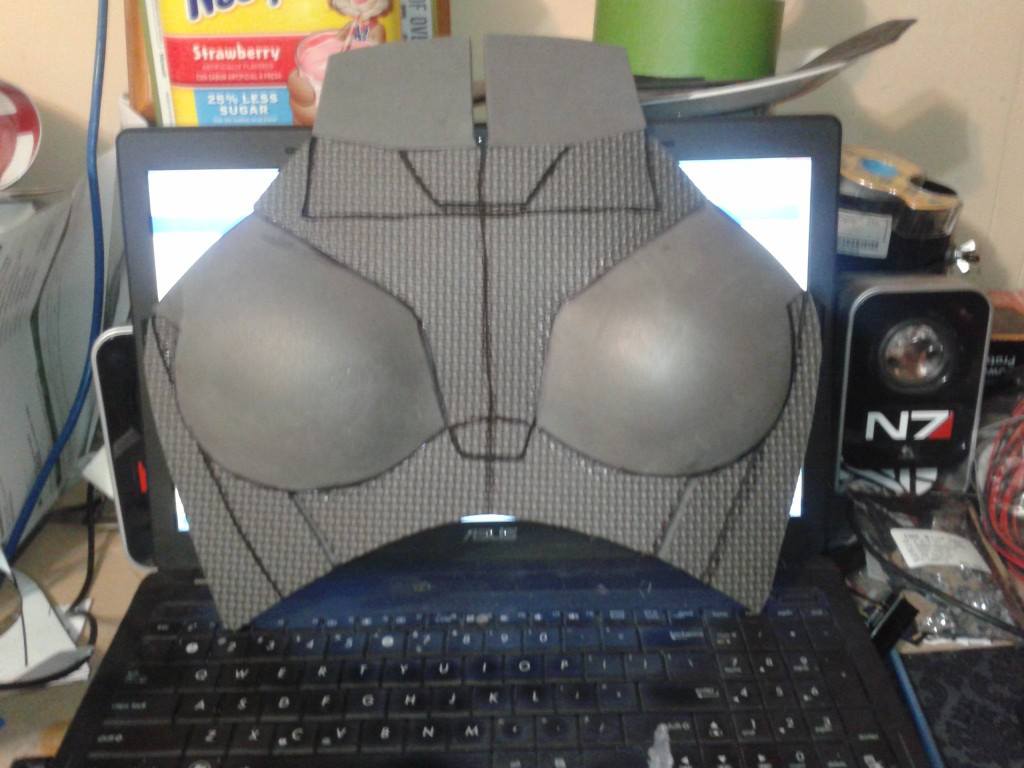 After that, the rest of the pieces were rote, I just had to remember to shape them differently after cutting and assembly. 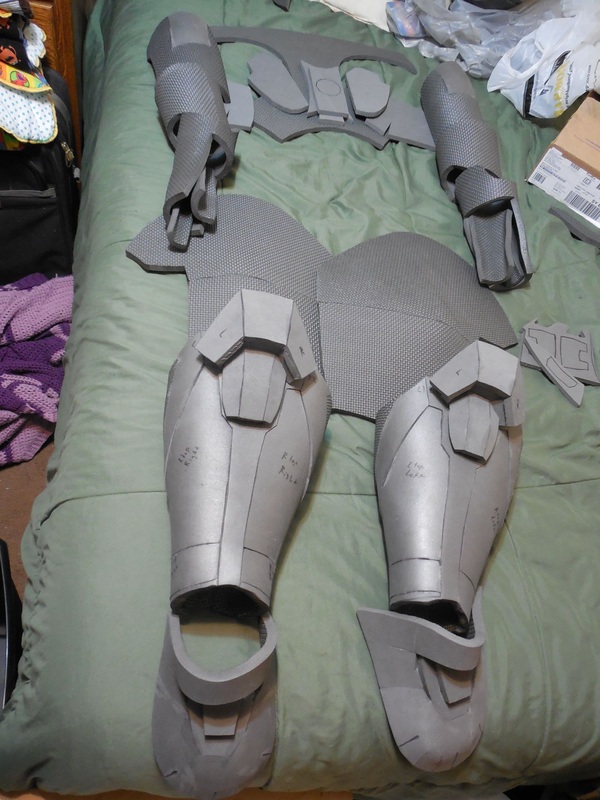 The shoulder bells were a little trickier, but I ended up freehanding them. They're essentially 2 layers of foam, but stacked one on top of the other unlike BroShep, which the bell itself attaches to the end of the under piece, and that piece sticks out a bit. FemShep, though, the main piece is the under piece, and the upper bell is really just an extended panel. It'll make better sense once you see the pics of it, I promise. :) Anyway, all pieces done and shaped, so I threw on the Plasti Dip and paint! 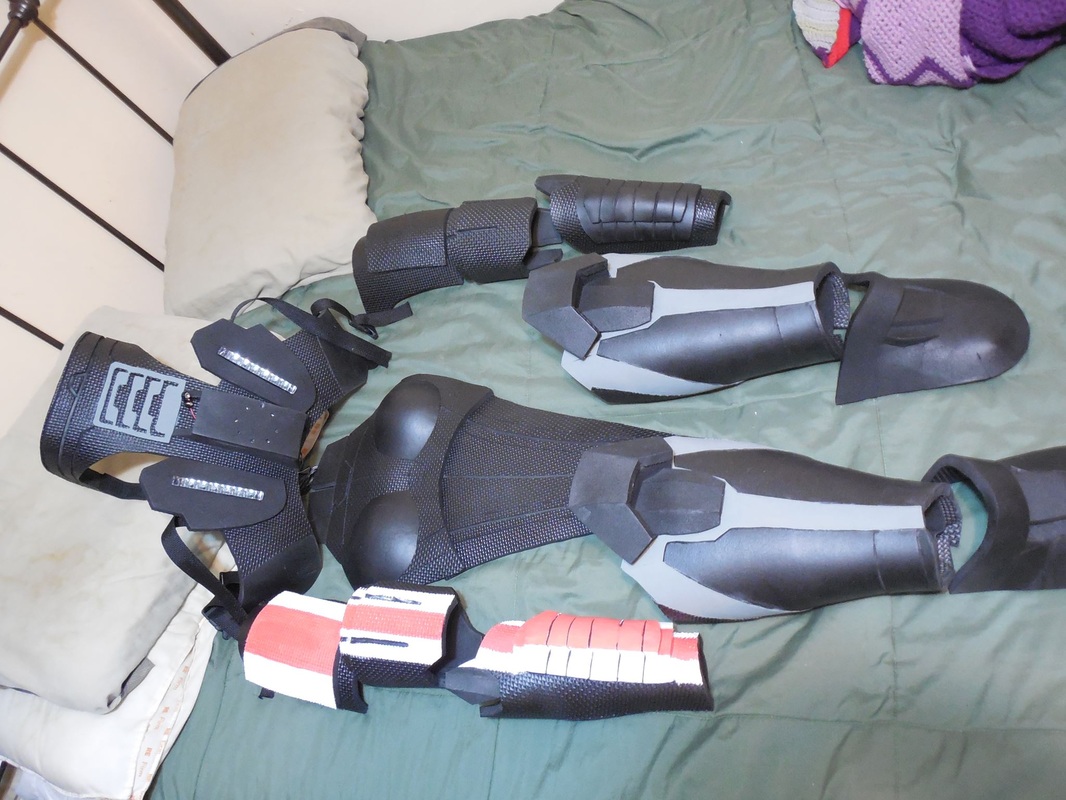 See the bells now? Make better sense? Good. ;) Strapped everything together, leaving room on them for the client to be able to adjust to a better fit for them when they got it. Once all the straps were on and everything looked good, it was time, as always, to weather the armor! The spine is also custom and freehanded, to save a bit of time and give a unique look to the armor. Making the same armor over and over is nice and all, but I try to throw something different into each one to give it a little bit of its own character.  This was a lot of fun, and gave me some good insight into manipulating the foam. Love learning new things! :D
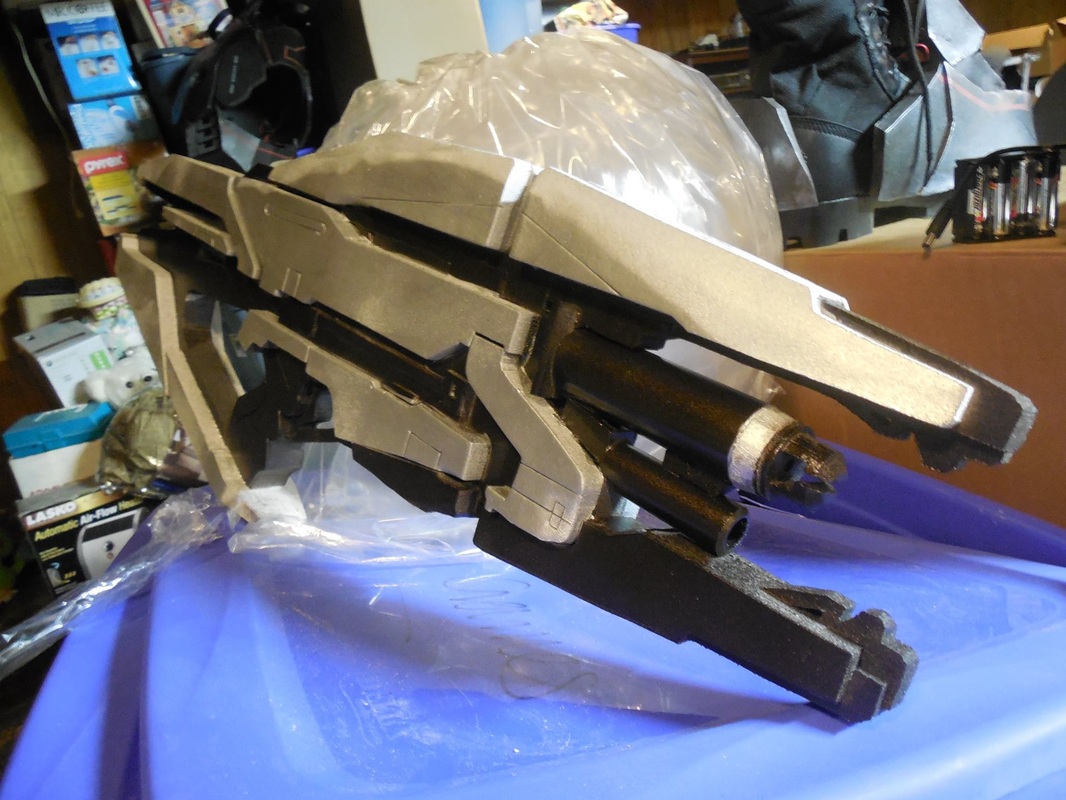
Still going, on this day of write-up catch up! Now we come to an oldie with a twist. Back in 2012 I was commissioned to make a Cerberus Harrier, which you can read the write-up for here. This time I was commissioned to make another, just as large, but they wanted a special, unique paint job: they wanted it Alliance. You'll want to click the link above to get all the meaty details on the assembly process, since I'm going to skip quite a few of the opening bits: the stacking/layering/gluing of the foam, cutting it all out, beveling the edges, and gluing all that together. Nope, I'm going to skip right to the juicy bits, since by now you should all know the steps I take to make these foam props. And if you don't, click the link above so you do, then meet us back here. ... Everybody ready? Let's go. First up, due to the move I was unable to find the alternate barrels I had made as an experiment with the first Harrier. Thanks to that, I had to make a new set of barrels, but I didn't have the PVC pipes or connectors like I did before. So, I got a little creative and blatantly "borrowed" a trick from Punished Props. 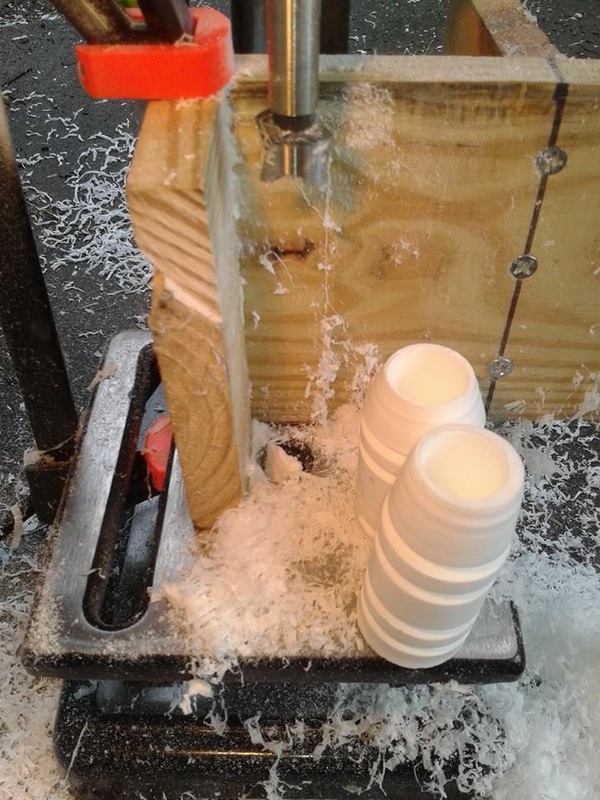
I had a couple cups full of excess casting resin, building up when I have a bit left over when I make castings. I put these on my lathe, got covered in thin white ribbons, and turned out the two barrels. Then I took them to my drill press and drilled out the holes in the fronts with a forstner bit. From there, it was a simple job attaching them to the front of the Harrier. 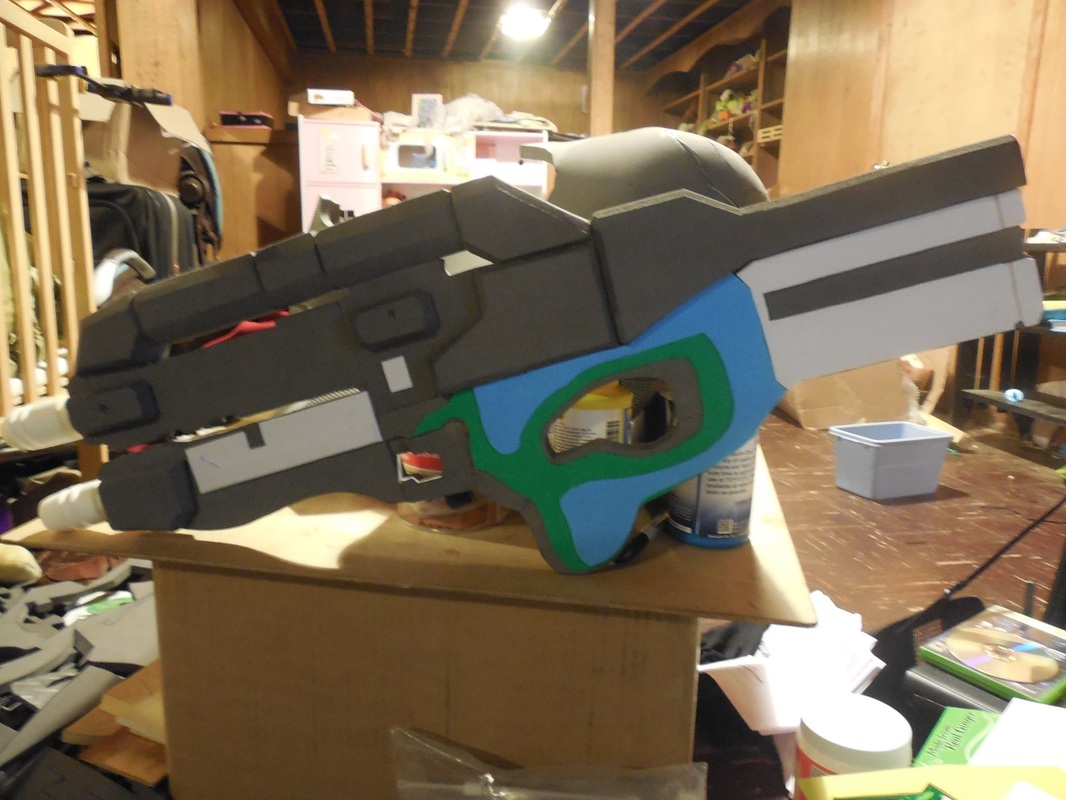
Naturally, from here came the detailing, done like the M8 version 3 and M99 Saber: light etching with the xacto knife and a heat gun to open the cut bits up a bit. Of course, then came the Plasti Dip, as always. 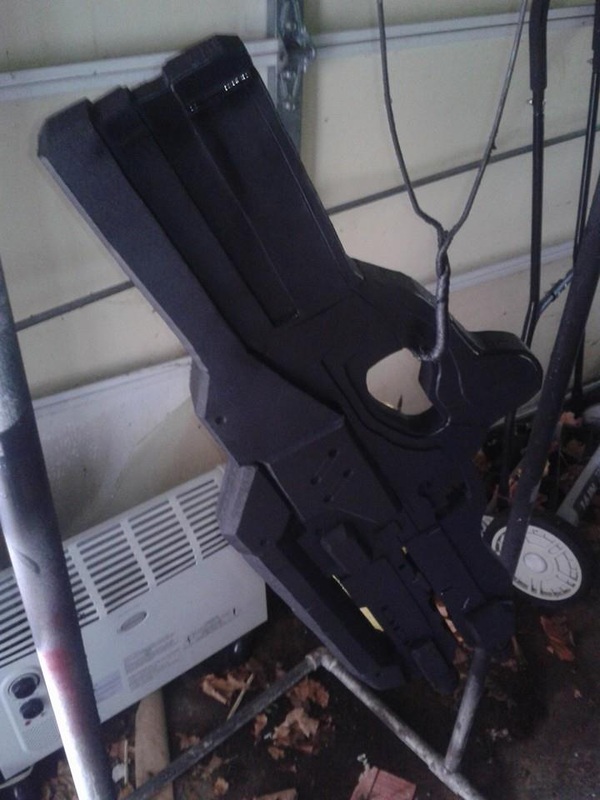
Now comes the really fun part: painting this thing the Alliance colors. Cerberus has it white, yellow, and black, with the logo on the stock. Alliance? Blue, silver, and black, and a totally different logo. That really makes things interesting, and gives it a whole different feel. First up, the bottom layer of blue. 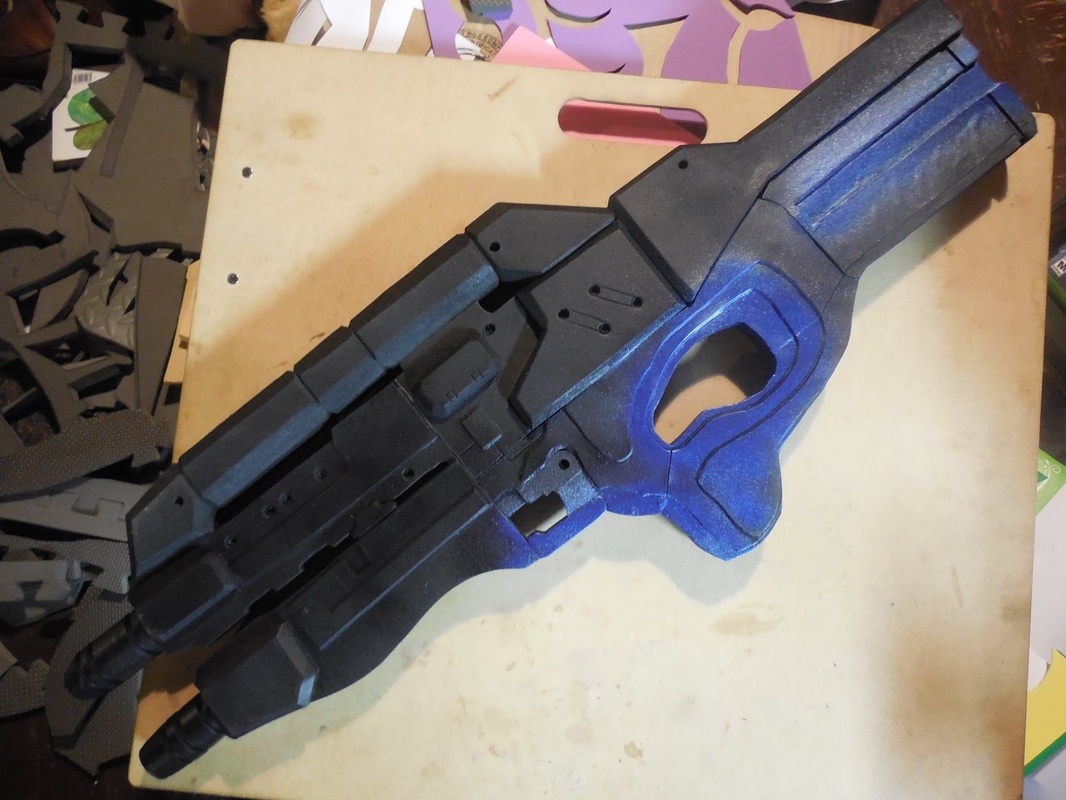
Since blue is replacing the white, and since it's easier to tape from the bottom-most layer and work my way up, I started with the bit around the thumb hole area, the front of the grip, and the slit in the stock. Then I taped those up, and covered the whole thing in silver. I don't have a picture of that step, but the next one was the same: tape up the silver for the final set of blue. 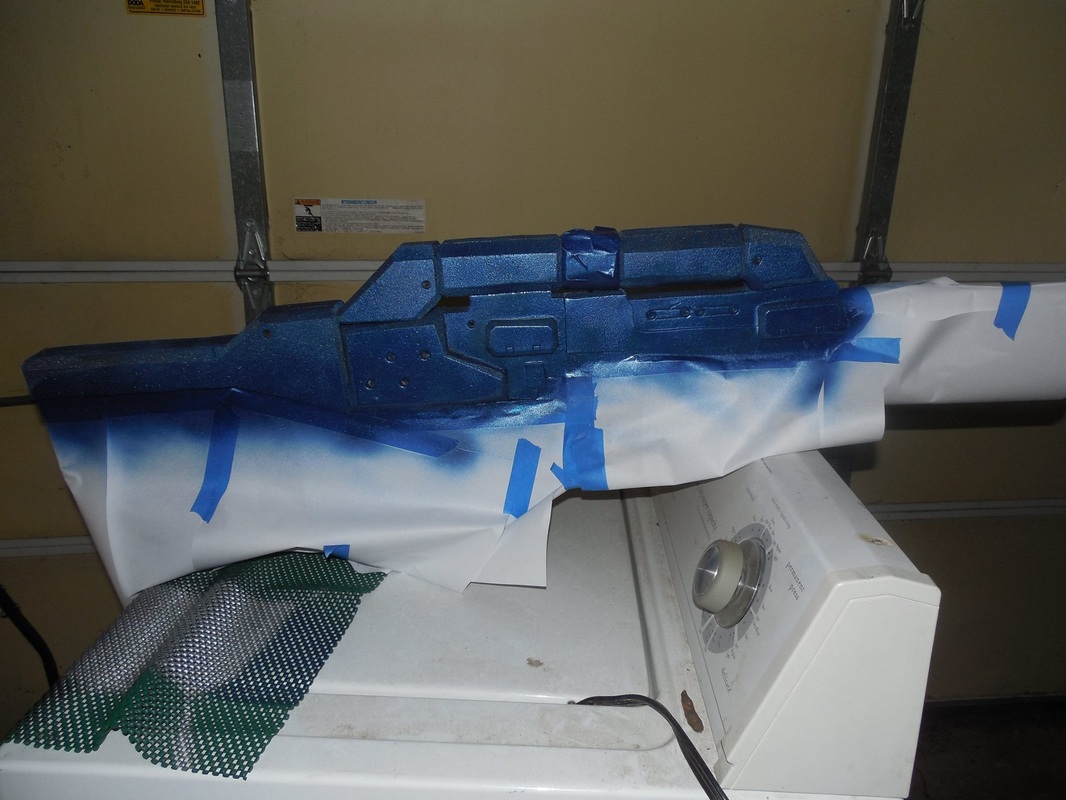
Once that all dried, I took the tape off, which is always my favorite part after painting. Totally feel like I'm opening a Christmas present to find all the awesomeness inside! And, naturally, the Alliance Harrier was no exception. Of course, I also had to tape it all back up, just to paint on the black decals and add the Alliance symbol where the Cerberus one would normally sit. 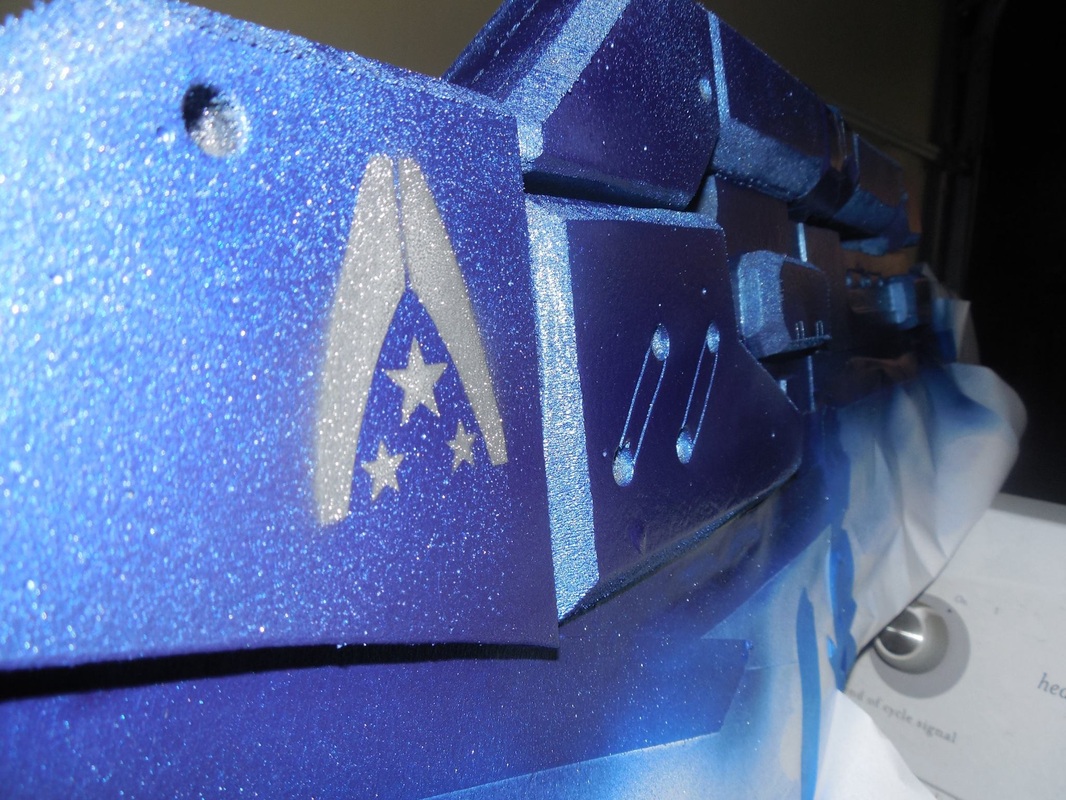
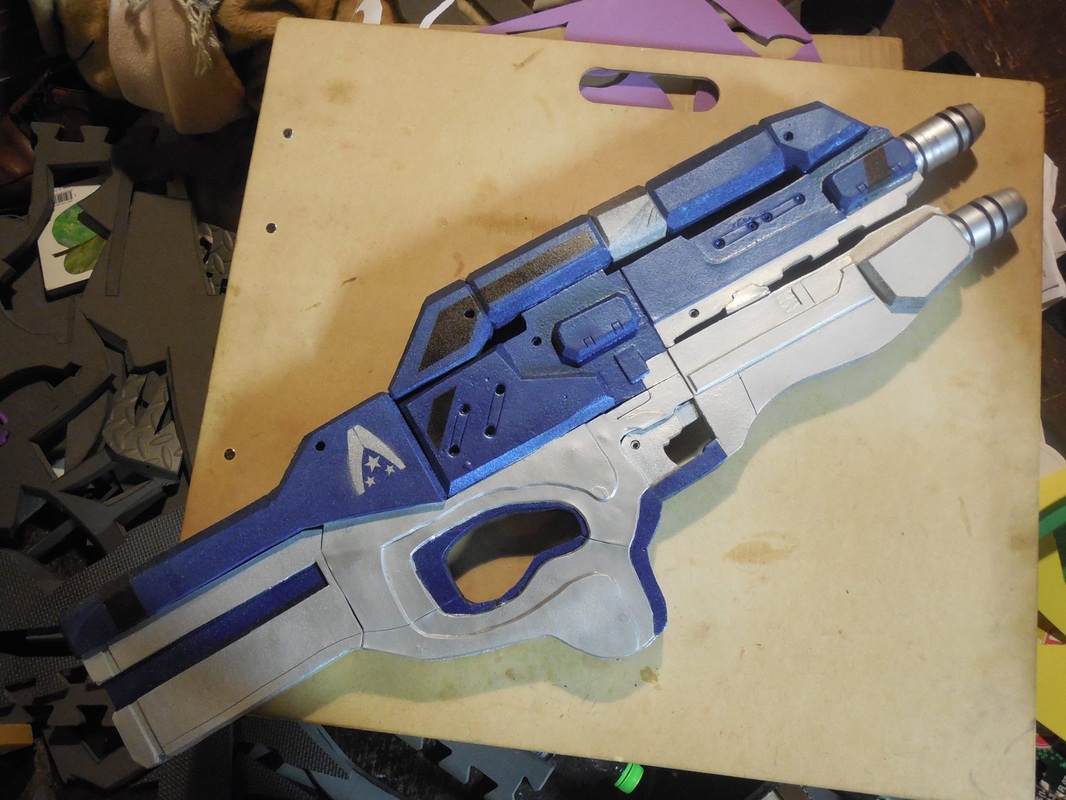
I didn't add the lettering or anything like that, because I didn't have the extra set I had made and I didn't want to etch out a whole new stencil for it. Not that it mattered, as I think it looks awesome as it is. :) Of course, now it needed to look even better, so on came the weathering! More black acrylic wash, with dry brushing various colors. I tried layering a few different colors to make the effect pop out better, and I think I'm getting better at that. Just need to work on which colors look more natural together at the end result. The final product: 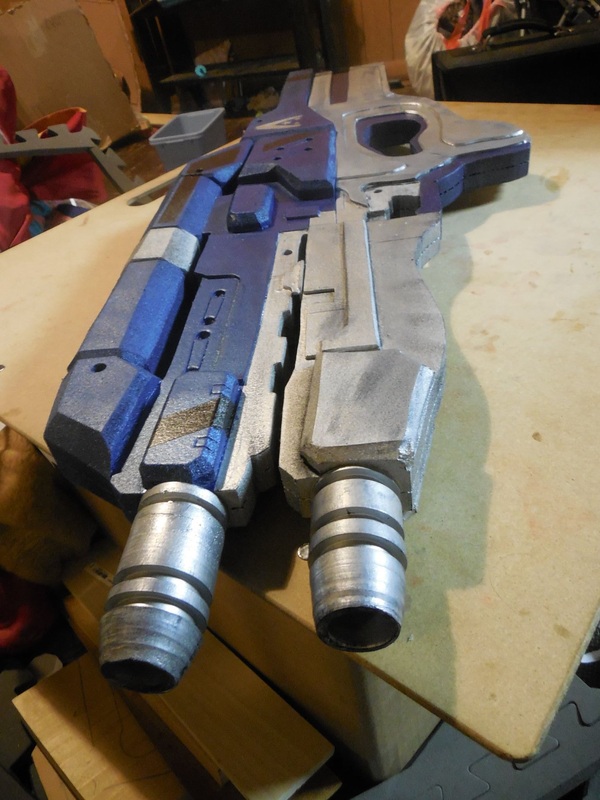
I kept it still kind-of new, like it was only recently off the assembly line - or just repainted after acquiring it on a raid or something. Still though, I'm really happy with how it turned out, and it was certainly a big hit when I revealed the alternate scheme on my Facebook page. Hope you enjoyed!
|
|


 RSS Feed
